What are the requirements and precautions for PCB silkscreen design?
1. Silkscreen design requirements
The ratio of character height to character width of silkscreen characters is generally required to be ≥6:1. There are three common font sizes: among them, when the board density is relatively high, 4/25mil characters (No. 1) are commonly used; when the density is normal, 5/ 30mil characters (No. 2); when the board is relatively loose, 6/45mil characters (No. 3) are recommended; usually the base copper thickness of the surface layer also has corresponding requirements for the silk screen width, base copper <1OZ, limit value ≥4mil, optimization value ≥6mil; When the base copper thickness is 1OZ, 5/30mil characters are preferred; when the base copper thickness is 2OZ, 6/45mil characters are preferred.
2. Requirements for adding PCB silkscreen printing
1. Placement: Generally speaking, when placing the silk screen of resistors, capacitors, tubes and other devices, do not use four directions. This will make it very tiring to look at the silkscreen during debugging, maintenance and welding ( How many directions does the board need to turn).
2. Try not to punch the via holes on the silk screen.
3. Do not press the silk screen on high-speed signal lines (such as clock lines, etc.): For high-speed signal lines on the top or bottom layer, because such signal lines can be regarded as microstrip lines.
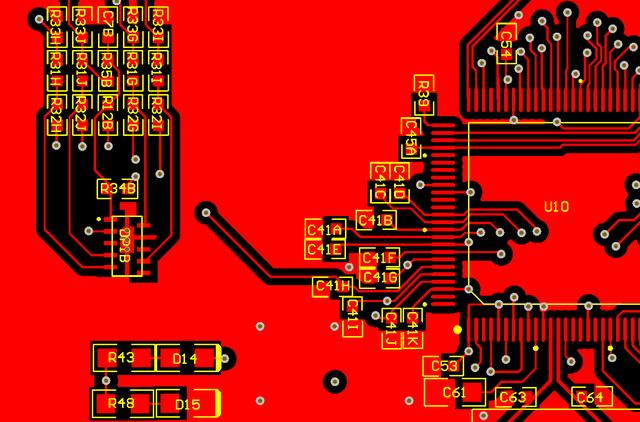
4. The reading direction of the silk screen should be consistent with the usage direction. The reading direction of the silkscreen should be consistent with the usage direction of the chip. This is mainly to reduce the probability of reverse soldering when welding.
5. The pin number must be clearly marked on the silkscreen.
6. Silkscreen printing for special packages: For special packages such as BGA and QFN, the size of the silk screen must be exactly the same as the size of the chip.
7. Silkscreen printing of the mounting holes: The silkscreen printing of the screws is added near the mounting holes, and the length and total number of screws are also marked to facilitate installation.
3. Precautions for silkscreen design
1. The silkscreen line width on the board should be ≥ 4 mil, and avoid the screen printing line width of components being 0.
2. The distance between the silkscreen and the pads: Do not cover the soldering points on the board with the silkscreen, such as the pads of SMD devices and the through holes of plug-ins. The silkscreen is an insulating material. Once it is applied to the pads, it will cause poor welding; do not cover the test points on the board. , mark points, etc.; it is usually required to maintain a 6mil spacing.
3. The spacing between silkscreens: maintain 6 mil. Overlapping between silkscreens is acceptable. Once the overlap causes unrecognizability, it needs to be adjusted away.
4. Silk screen printing direction: The arrangement of silkscreen strings should follow the principle of from left to right or bottom to top when looking at the screen.
5. Placement of device reference numbers: The device reference numbers should correspond to the devices one-to-one, and the order cannot be reversed or changed. When the device density is relatively high, the method of drawing out labels or symbol markings can be used to place the reference numbers on other parts of the board. Wherever there is space.
6. The component polarity markings and “1” pin markings must be placed correctly and clearly.
7. When introducing annotations or symbol annotations, the added silkscreen and characters should be placed on the silkscreen layer of Board Geometry.
The added board name and version number silkscreen is also placed on the silkscreen layer of Board Geometry.
8. The device tag cannot be placed inside the device body or outside the board frame.
9. When the board density is relatively high and there is really no space to place the tags, you can discuss with the customer not to use the tags, but an assembly drawing is required to facilitate device installation and inspection.
10. When the customer requires copper characters to be written on the top and bottom layers, the line width of the copper characters: HOZ base copper – the character width is more than 8 mil and the height is more than 45 mil; 1OZ base copper – the character width is more than 10 mil and the height is more than 50 mil. At the same time, it is necessary to open the solder mask window so that the copper characters on the produced board will be brighter.

