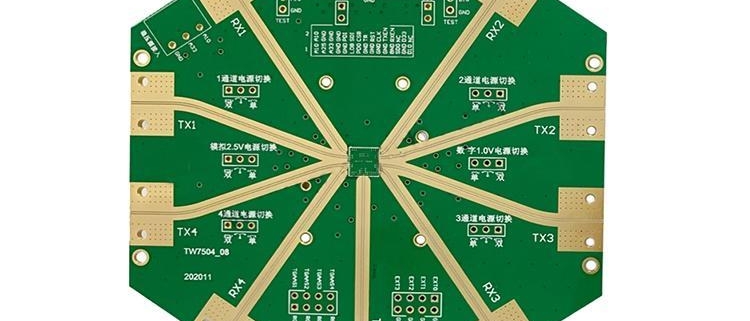
Three special wiring techniques for PCB

1. Right-angle routing (three aspects)

The impact of right-angle wiring on signals is mainly reflected in three aspects: first, the corners can be equivalent to capacitive loads on the transmission line, slowing down the rise time; second, impedance discontinuity will cause signal reflection; third, right-angle tips produce In the field of EMI and RF design above 10GHz, these small right angles may become the focus of high-speed problems.

2. Differential routing (“equal length, equal distance, reference plane”)

What is Differential Signal? In layman’s terms, the driving end sends two equal and opposite signals, and the receiving end determines the logic state “0” or “1” by comparing the difference between the two voltages. The pair of traces that carry differential signals are called differential traces. Compared with ordinary single-ended signal wiring, the most obvious advantages of differential signals are reflected in the following three aspects:

1. Strong anti-interference ability, because the coupling between the two differential traces is very good. When there is noise interference from the outside, it is coupled to the two lines almost at the same time, and the receiving end only cares about the difference between the two signals. Therefore, external common mode noise can be completely offset.

2. It can effectively suppress EMI. In the same way, since the polarity of the two signals is opposite, the electromagnetic fields radiated by them can cancel each other out. The closer the coupling, the less electromagnetic energy released to the outside world.

3. Accurate timing positioning. Since the switching change of the differential signal is located at the intersection of the two signals, unlike ordinary single-ended signals that rely on high and low threshold voltages to judge, it is less affected by process and temperature, and can reduce timing errors. , and it is also more suitable for circuits with low amplitude signals. The currently popular LVDS (low voltage differential signaling) refers to this small amplitude differential signaling technology.

3. Snake line (adjust delay)

The serpentine line is a type of wiring method often used in Layout. Its main purpose is to adjust the delay and meet the system timing design requirements. The two most critical parameters are parallel coupling length (Lp) and coupling distance (S). Obviously, when signals are transmitted on a serpentine line, coupling will occur between parallel line segments in the form of differential mode, S The smaller it is, the larger Lp is, and the greater the degree of coupling. It may lead to a reduction in transmission delay and a significant reduction in signal quality due to crosstalk. The mechanism can be referred to the analysis of common mode and differential mode crosstalk. Here are some suggestions for Layout engineers when dealing with serpentine lines:

1. Try to increase the distance (S) between parallel line segments, at least greater than 3H. H refers to the distance from the signal trace to the reference plane. In layman’s terms, it means routing the wire around a big bend. As long as S is large enough, mutual coupling effects can be almost completely avoided.

2. Reduce the coupling length Lp. When twice the Lp delay approaches or exceeds the signal rise time, the crosstalk generated will reach saturation.

3. The signal transmission delay caused by the serpentine line of Strip-Line or Embedded Micro-strip is smaller than that of Micro-strip. In theory, stripline will not affect the transmission rate due to differential mode crosstalk.

4. For high-speed signal lines and those with strict timing requirements, try not to use serpentine lines, especially in small areas.

5. Snake wiring at any angle can often be used, which can effectively reduce mutual coupling.

6. In high-speed PCB design, serpentine lines have no so-called filtering or anti-interference capabilities and can only reduce signal quality, so they are only used for timing matching and have no other purpose.

7. Sometimes spiral wiring can be considered for winding. Simulation shows that its effect is better than normal serpentine wiring.

Surgery is very important, and postoperative recovery is also essential! Now that we’ve talked about PCB wiring, is it enough to finish laying out the wiring? Obviously, no! Inspection after PCB wiring is also necessary, so how to inspect the wiring in PCB design to pave the way for subsequent design? See below!

General PCB design drawing inspection items

1) Has the circuit been analyzed? Is the circuit divided into basic units for smoothing the signal?

2) Does the circuit allow short or isolated critical leads?

3) Are the places that must be shielded effectively shielded?

4) Have you made full use of the basic grid graphics?

5) Is the size of the printed circuit board the optimal size?

6) Are the selected wire widths and spacing used where possible?

7) Are the preferred pad sizes and hole sizes used?

8) Are the photographic plates and sketches suitable?

9) Are the minimum number of jumpers used? Do jumper wires pass through components and accessories?

l0) Are the letters visible after assembly? Is it the correct size and model?

11) In order to prevent blistering, are windows opened on large areas of copper foil?

12) Are there tool positioning holes?

PCB electrical characteristics inspection items:

1) Have the effects of wire resistance, inductance, and capacitance been analyzed? Especially the impact on the critical voltage drop phase grounding?

2) Do the spacing and shape of wire accessories meet the insulation requirements?

3) Is the insulation resistance value controlled and specified at key points?

4) Is the polarity fully recognized?

5) From a geometric perspective, has the influence of wire spacing on leakage resistance and voltage been measured?

6) Has the medium used to change the surface coating been identified?

PCB physical characteristics inspection items:

1) Are all pads and their locations suitable for final assembly?

2) Can the assembled printed circuit board meet the impact and vibration power conditions?

3) What is the spacing between the specified standard components?

4) Are the components that are not firmly installed or heavy parts fixed?

5) Is the heat dissipation and cooling of the heating element correct? Or is it isolated from the printed circuit board and other heat sensitive components?

6) Are voltage dividers and other multi-lead components positioned correctly?

7) Is the component arrangement and orientation easy to inspect?

8) Have all possible interferences on the printed circuit board and the entire printed circuit board assembly been eliminated?

9) Is the size of the positioning hole correct?

10) Are the tolerances complete and reasonable?

11) Have the physical properties of all coating layers been controlled and signed?

12) Is the hole to lead diameter ratio within an acceptable range?

PCB mechanical design factors:

Although the printed circuit board mechanically supports components, it cannot be used as a structural member of the entire device. On the edge of the printing plate, provide a certain amount of support at least every 5 inches. Factors that must be considered when selecting and designing a printed circuit board are as follows;

1) Structure of printed circuit board – size and shape.

2) Types of mechanical accessories and plugs (seats) required.

3) The adaptability of the circuit to other circuits and environmental conditions.

4) Consider mounting the printed circuit board vertically or horizontally based on factors such as heat and dust.

5) Some environmental factors that require special attention, such as heat dissipation, ventilation, shock, vibration, and humidity. Dust, salt spray and radiation.

6) Degree of support.

7) Maintain and fix.

8) Easy to take off.

PCB printed circuit board installation requirements:

Support should be within 1 inch of at least three edges of the printed circuit board. According to practical experience, the spacing between support points of printed circuit boards with a thickness of 0.031–0.062 inches should be at least 4 inches; for printed circuit boards with a thickness greater than 0.093 inches, the spacing between support points should be at least 5 inches. Taking this measure improves the rigidity of the printed circuit board and destroys possible resonances in the printed circuit board.

The mounting technology used for a certain printed circuit board can usually be decided after considering the following factors.

1) Size and shape of printed circuit board.

2) Number of input and output terminals.

3) Available equipment space.

4) The desired convenience of loading and unloading.

5) Type of installation accessories.

6) Required heat dissipation.

7) Required shieldability.

8) The type of circuit and its relationship with other circuits.

Printed circuit board allocation requirements:

1) Printed circuit board area that does not require mounting components.

2) The influence of plugging and unplugging tools on the installation distance between two printed circuit boards.

3) Mounting holes and slots must be specially prepared in the printed circuit board design.

4) When the insertion and removal tool is to be used in the equipment, its size must be especially considered.

5) A plug-in device is required, usually with rivets to permanently fix it to the printed circuit board assembly.

6) In the mounting rack of printed circuit boards, special designs such as load bearing flanges are required.

7) The adaptability of the plugging and unplugging tools used to the size, shape and thickness of the printed circuit board.

8) The cost involved in using plug-in tools includes both the price of the tool and the increased expenditure.

9) In order to tighten and use plug and pull tools, it is required to have access to the inside of the equipment to a certain extent.

PCB mechanical considerations:

The substrate properties that have an important impact on printed circuit assemblies are: water absorption, thermal expansion coefficient, heat resistance, flexural strength, impact strength, tensile strength, shear strength and hardness.

All of these characteristics affect both the functionality and productivity of the printed circuit board structure.

For most applications, the dielectric backing of a printed circuit board is one of the following substrates:

1) Phenolic impregnated paper.

2) Acrylic-polyester impregnated randomly arranged glass mat.

3) Epoxy impregnated paper.

4) Epoxy impregnated glass cloth.

Each substrate can be flame retardant or combustible. The above 1, 2 and 3 can be punched. The most commonly used material for metallized hole printed circuit boards is epoxy-glass cloth, which has dimensional stability suitable for

It is used for high-density circuits and can minimize the occurrence of cracks in metalized holes.

One disadvantage of epoxy-glass cloth laminates is that they are difficult to punch within the common thickness ranges of printed circuit boards. For this reason, all holes are usually drilled and patterned.

Milling operation to form the shape of the printed circuit board.

PCB electrical considerations:

In DC or low-frequency AC situations, the most important electrical properties of insulating substrates are: insulation resistance, arc resistance, printed wire resistance and breakdown strength.

In high-frequency and microwave applications: dielectric constant, capacitance, and dissipation factors.

In all applications, the current carrying capacity of printed conductors is important.

Wire pattern:

PCB routing path and positioning

Under the constraints of prescribed wiring rules, printed wires should take the shortest route between components. Limit coupling between parallel conductors as much as possible. Good design requires a minimum number of wiring layers

, corresponding to the required packaging density, the widest wires and the largest pad size are also required. Because rounded and smooth inner corners may avoid some possible electrical and

Mechanical problems, so sharp corners and sharp corners in the wires should be avoided.

PCB width and thickness:

Ampacity of etched copper conductors on rigid printed circuit boards. For 1 oz and 2 oz wires, a reduction in nominal value is allowed to take into account etching methods and normal variations in copper foil thickness and temperature differences.

10% (based on load current); for printed circuit board assemblies coated with a protective layer (substrate thickness less than 0.032 inches, copper foil thickness more than 3 ounces), components are reduced by 15%; for

Dip-soldered printed circuit boards are allowed to be reduced by 30%.

PCB wire spacing:

Minimum spacing between conductors must be determined to eliminate voltage breakdown or arcing between adjacent conductors. Spacing is variable and depends primarily on the following factors:

1) Peak voltage between adjacent wires.

2) Atmospheric pressure (maximum working altitude).

3) Coating layer used.

4) Capacitive coupling parameters.

Critical impedance components or high-frequency components are generally placed very close to reduce critical stage delays. Transformers and inductive components should be isolated to prevent coupling; inductive signal leads should

Arrange orthogonally at right angles; components that produce any electrical noise due to magnetic field motion should be isolated or rigidly mounted to prevent excessive vibration.

PCB wire pattern inspection:

1) Are the wires short and straight without sacrificing functionality?

2) Are the wire width restrictions observed?

3) Is there any minimum wire spacing that must be ensured between wires, between wires and mounting holes, between wires and pads?

4) Have all wires (including component leads) been routed in close proximity to each other in parallel?

5) Are sharp angles (90°C or less) avoided in the conductor pattern?

PCB design project inspection item list:

1. Check the rationality and correctness of the schematic diagram;

2. Check the correctness of the component packaging of the schematic diagram;

3. The distance between strong and weak electricity and the distance between isolation areas;

4. Check the schematic diagram and PCB diagram accordingly to prevent the loss of the network table;

5. Whether the packaging of the components matches the actual product;

6. Whether the components are placed appropriately:

7. Whether the components are easy to install and disassemble;

8. Whether the temperature-sensitive component is too close to the heating component;

9. Whether the distance and direction of the components that can produce mutual inductance are appropriate;

10. Whether the placement of connectors is smooth;

11. Easy to plug in and out;

12. Input and output;

13. Strong electricity and weak electricity;

14. Whether digital simulation is interleaved;

15. Arrangement of components on the upwind and leeward sides;

16. Whether the directional components are incorrectly flipped instead of rotated;

17. Whether the mounting holes of the component pins are suitable and whether they can be easily inserted;

18. Check whether the empty pin of each component is normal and whether it is a leak;

19. Check whether there are via holes in the upper and lower wiring of the same network table. The pads are connected through the holes to prevent disconnection and ensure the integrity of the circuit;

20. Check whether the characters on the upper and lower layers are placed correctly and reasonably. Do not put components to cover the characters to facilitate the operation of welding or maintenance personnel;

21. The very important connection between the upper and lower layer lines should not only be connected by the pads of the directly plugged components, but also preferably by via holes;

22. The arrangement of power and signal lines in the socket must ensure signal integrity and anti-interference;

23. Pay attention to the appropriate proportion of soldering pads and soldering holes;

24. Each plug should be placed on the edge of the PCB board as much as possible and easy to operate;

25. Check whether the component numbers match the components, and the components should be placed in the same direction and neatly as possible;

26. Without violating design rules, power and ground wires should be as thick as possible;

27. Under normal circumstances, the upper layer adopts horizontal lines and the lower layer adopts vertical lines, and the chamfer is not less than 90 degrees;

28. Whether the size and distribution of the mounting holes on the PCB are appropriate to reduce the bending stress of the PCB as much as possible;

29. Pay attention to the height distribution of components on the PCB and the shape and size of the PCB to ensure easy assembly.

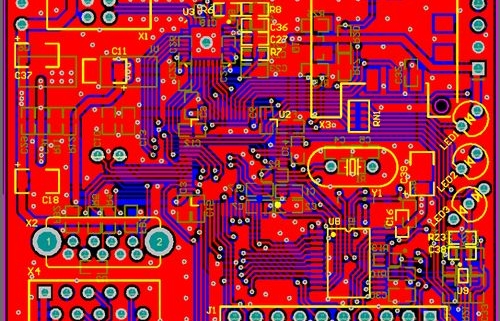
The past and present of printed circuit board

Printed circuit boards (PCBs) can be seen everywhere in life, ranging from Bluetooth headsets, electronic watches, calculators, to computers, communication equipment, military/aerospace systems. Wherever integrated circuits are needed, PCBs are inseparable from carrying electronic devices.

Before the advent of PCBs, electronic components were directly connected with wires. For equipment that used a large amount of components, the wiring was often messy, posing great safety hazards and prone to errors.

图片
The emergence of PCB

In 1925, Charles Ducas of the United States printed a circuit pattern on an insulating substrate, and then used electroplating to successfully establish conductors for wiring. This method made it easier to manufacture electrical appliances. This is where the technical term “PCB” comes from.

In 1936, Austrian Dr. Paul Eisler published foil technology in the UK. He used printed circuit boards in a radio device. Also in 1936, Japan’s Miyamoto Kinosuke successfully applied for a patent for the spray-on wiring method. Of the two, Paul Eisler’s method is most similar to today’s printed circuit boards. This method is called the subtractive method, which removes unnecessary metal. The approach of Charles Ducas and Miyamoto Kinosuke is to add only the required wiring, which is called the additive method. Paul Eisler is also known as the “Father of Printed Circuits”. However, because the electronic tube components at that time generated a lot of heat, were bulky, and were inconvenient to install on printed circuit boards, this important invention of Paul Eisler was not taken seriously by the British at that time. , and in the United States, PCB manufacturing technology is only used in military products.

In 1942, Dr. Paul Eisler continued to improve his PCB production method and invented the world’s first practical double-sided PCB, which was officially produced at Pye Company. The patent application was approved in 1943. Around 1943, the United States began to use Paul Eisler’s technological invention on a large scale to create proximity fuses for use in World War II, using printed circuits as proximity fuses on bombs to act as bombs when they were close to the intended target. explosion timing device. At the same time, this technology is widely used in military radios.
In 1947, epoxy resin began to be used as a manufacturing substrate. At the same time, NBS began to research manufacturing technologies such as coils, capacitors, and resistors using printed circuit technology.
In 1948, the United States officially recognized the printed circuit board invention for commercial use.

Development of PCB

From the 1950s to the 1990s. This is the stage when the PCB industry was formed and grew rapidly, that is, the early stage of PCB industrialization. At this time, PCB has become an industry.
After 1948, the United States officially recognized the invention of PCB for commercial use, which also meant that PCB began to be commercialized on a large scale from military use. With the development of electronic technology, in December 1947, a research team composed of Shockley, Bardeen and Bratton at Bell Labs in the United States developed the transistor. Transistors with lower heat generation and smaller size began to replace them in large numbers in the 1950s. The status of electronic tubes has also created conditions for the widespread use of printed circuit board technology.
In 1950, a Japanese company tried coating silver on a glass substrate as a conductor and using copper foil on a phenolic resin paper substrate. Beginning in the 1950s, printed circuit manufacturing techniques became widely accepted, with etching playing a leading role. As transistors began to become practical, single-sided PCBs made by metal foil etching were successfully developed in the United States and quickly gained industrial application.
In 1951, polyimide material was born.
In 1953, Motorola developed a double-sided panel using the electroplated via method. Around 1955, Japan’s Toshiba Corporation introduced a technology to generate copper oxide on the surface of copper foil, and copper clad laminates (CCL) appeared. Both technologies were later widely used in the manufacture of multilayer printed circuit boards, and they contributed to the emergence of multilayer printed circuit boards. Since then, multi-layer PCB has been widely used.
In the 1960s, 10 years after printed circuit boards were widely used, PCB technology became increasingly mature. Since the advent of Motorola’s double-sided panels, multi-layer printed circuit boards have begun to appear, which has increased the ratio of wiring to substrate area.
In the 1960s, multi-layer (4+layers) PCBs began to be produced. The electroplated through-hole metallized double-sided PCB has achieved mass production.
In the 1970s, multi-layer PCBs developed rapidly and continued to develop in the direction of high precision, high density, fine line holes, high reliability, low cost and automated continuous production to adapt to the pace of Moore’s Law. Although multi-layer PCBs began to develop rapidly in the 1970s, PCB design work at that time was still completed manually.
The maturity of PCB

In 1993, Paul T. Lin of Motorola applied for a patent for a package called BGA (ball grid array), which marked the beginning of organic packaging substrates.
In 1995, Panasonic developed BUM PCB manufacturing technology with the ALIVH (arbitrary interlayer via) structure. This also marks the beginning of PCB’s entry into the era of HDI high-density interconnection.
In the early 2000s, PCBs became smaller and more complex. 5-6 mil line width/line spacing is already a conventional process. For high-end PCB board manufacturers, they began to manufacture circuit boards with 3.5-4.5 mil line width/line spacing. At the same time, flexible PCBs became more common.
In 2006, the per-layer interconnect (ELIC) process was developed. The process uses stacks of copper to fill microvias to make connections through each layer of the circuit board. This unique process enables developers to create stacked connections between any two layers in a PCB. While this process increased the level of flexibility, allowing designers to maximize interconnect density, it was not until the 2010s that ELIC PCBs became widely used.
With the development of smartphones, it is driving the development of HDI PCB technology. At the beginning of the 21st century, while retaining laser-drilled micro-vias, stacked vias began to replace staggered vias, and combined with “any layer” construction technology, the final line width/line spacing of HDI boards reached 40μm. This arbitrary layer approach is still based on a subtractive process, and it is certain that most high-end HDI still uses this technology for mobile electronics. However, in 2017, HDI began to enter a new stage of development and began to shift from a subtractive process to a process based on pattern plating.

图片

The future of PCBs

HDI and micropores provide a huge boost to high density due to miniaturization. These technologies will continue to evolve as IC cell geometries become smaller. So the next revolution will be in the field of optical conductors.

With the continuous improvement of VLSI technology, the performance of processors in computer systems has improved. However, electronic computers still use traditional copper wires to realize chip-chip, processor-processor, circuit board-circuit board connections. Connection, the International Technology Roadmap for Semiconductors (ITRS) has pointed out that future electronic systems will be limited by the interconnection between chips, because the main problems faced by the currently mainly used copper wires are: (1) high-speed signal distortion and limited bandwidth; (2) The transmission loss of metal wires increases with the increase of signal frequency, limiting the transmission distance of high-frequency signals; (3) Susceptible to electromagnetic interference; (4) High power consumption, etc.

Optical communication has many advantages that traditional electrical signals do not have, such as high bandwidth, low loss, no crosstalk, resistance to electromagnetic interference, etc. In fact, optical fibers have completely replaced traditional copper wires for long-distance communications for decades. The future development trend is that the communication distance of optical interconnections will gradually become shorter, from long-distance communications between countries to future chips. Internal signal transmission.
At present, the industry generally believes that when the single-channel rate reaches above 25Gb/s, electrical interconnection will face great challenges in terms of technical implementation and cost. Therefore, in order to overcome the “bottleneck” of electronic computers, we must change the traditional copper wire-based interconnection method, introduce optical technology into electronic systems, and replace traditional electrical interconnections with new optical interconnections. It will significantly increase the running speed of computers and promote the development of high-speed information communication networks, thereby meeting the needs of social development.

EMI solutions for multi-layer PCB design

We know that when designing circuits, in order to improve the performance of the product, we must take into account the electromagnetic interference it receives. There are many ways to solve EMI problems. Modern EMI suppression methods include: using EMI suppression coatings, selecting appropriate EMI suppression components and EMI simulation design, etc. This article starts from the most basic PCB layout and discusses the role and design techniques of PCB layer stacking in controlling EMI radiation.

Power bus

Reasonably placing a capacitor of appropriate capacity near the IC’s power pin can make the IC’s output voltage jump faster. However, the problem does not end there. Due to the finite frequency response of the capacitor, the capacitor cannot generate the harmonic power required to cleanly drive the IC output over the full frequency band. In addition, the transient voltage formed on the power bus will form a voltage drop across the inductor of the decoupling path. These transient voltages are the main source of common-mode EMI interference. How should we solve these problems?

In the case of ICs on our circuit boards, the power plane around the IC can be thought of as a good high-frequency capacitor, which collects the energy leaked from the discrete capacitors that provide high-frequency energy for a clean output. In addition, the inductance of a good power supply layer should be small, so the transient signal synthesized by the inductor should also be small, thereby reducing common-mode EMI.

Of course, the connection from the power layer to the IC power pin must be as short as possible, because the rising edge of the digital signal is getting faster and faster. It is best to connect it directly to the pad where the IC power pin is located, which needs to be discussed separately.

To control common-mode EMI, the power plane must aid in decoupling and have sufficiently low inductance. This power plane must be paired with a reasonably well-designed power plane. Some may ask, how good is good? The answer to the question depends on the layering of the power supply, the materials between the layers, and the operating frequency (i.e., a function of the IC rise time). Typically, the spacing between power layers is 6mil, and the interlayer is made of FR4 material, so the equivalent capacitance of the power layer per square inch is about 75pF. Obviously, the smaller the layer spacing, the greater the capacitance.

There are not many devices with a rise time of 100 to 300ps, but according to the current IC development speed, devices with a rise time in the range of 100 to 300ps will account for a high proportion. For circuits with 100 to 300ps rise time, 3mil layer spacing will no longer be suitable for most applications. At that time, it will be necessary to use layering technology with layer spacing of less than 1 mil and replace the FR4 dielectric material with a material with a very high dielectric constant. Today, ceramics and ceramic-coated plastics can meet the design requirements of circuits with rise times from 100 to 300ps.

Although new materials and approaches may be adopted in the future, for today’s common 1 to 3ns rise time circuits, 3 to 6 mil layer spacing, and FR4 dielectric materials, it is usually sufficient to handle the high end harmonics and keep the transients low enough, that is , common mode EMI can be reduced very low. The PCB layer stackup design examples given in this article will assume a layer spacing of 3 to 6 mils.

Electromagnetic shielding

From the perspective of signal routing, a good layering strategy should be to place all signal routing on one or several layers, with these layers next to the power layer or ground layer. For power supply, a good layering strategy should be that the power layer is adjacent to the ground layer, and the distance between the power layer and the ground layer is as small as possible. This is what we call the “layering” strategy.

PCB stacking

What kind of stacking strategy helps shield and suppress EMI? The following layered stacking scheme assumes that the supply current flows on a single layer and that single or multiple voltages are distributed on different parts of the same layer. The case of multiple power planes is discussed later.

4 layers board

There are several potential problems with the 4-layer board design. First of all, for a traditional four-layer board with a thickness of 62 mil, even if the signal layer is on the outer layer and the power and ground layers are on the inner layer, the distance between the power layer and the ground layer is still too large.

If cost requirements are the first priority, you can consider the following two alternatives to traditional 4-layer boards. Both solutions can improve the performance of EMI suppression, but are only suitable when the component density on the board is low enough and there is sufficient area around the components to place the required power copper layer.

The first is the preferred solution. The outer layers of the PCB are both ground layers, and the two middle layers are signal/power layers. The power supply on the signal layer is routed with wide traces, which allows the supply current to have a low impedance path and the signal microstrip path to have a low impedance. From an EMI control perspective, this is the best 4-layer PCB structure available. In the second solution, the outer layer carries power and ground, and the middle two layers carry signals. Compared with the traditional 4-layer board, this solution has smaller improvements, and the interlayer impedance is as poor as the traditional 4-layer board.

If you want to control the trace impedance, the above stacking scheme must be very careful to arrange the traces under the power and ground copper islands. In addition, copper islands on power or ground planes should be interconnected as much as possible to ensure DC and low-frequency connectivity.

6-layer board

If the density of components on a 4-layer board is relatively high, it is best to use a 6-layer board. However, some stacking schemes in the 6-layer board design do not shield the electromagnetic field well enough, and have little effect on reducing the transient signal of the power bus. Two examples are discussed below.

In the first example, the power supply and ground are placed on the 2nd and 5th layers respectively. Since the copper impedance of the power supply is high, it is very unfavorable for controlling common mode EMI radiation. However, from the perspective of signal impedance control, this method is very correct.

How to design heat dissipation of PCB circuit board?

For electronic equipment, a certain amount of heat will be generated during operation, causing the internal temperature of the equipment to rise rapidly. If the heat is not dissipated in time, the equipment will continue to heat up, and the device will fail due to overheating. The reliability of electronic equipment Performance will decrease. Therefore, it is very important to handle the heat dissipation of the circuit board well. The heat dissipation of PCB circuit board is a very important link. So what are the heat dissipation techniques of PCB circuit board? Let’s discuss it together.

1. Heat dissipation through the PCB board itself. The currently widely used PCB boards are copper-clad/epoxy glass cloth base materials or phenolic resin glass cloth base materials, and there are also a small amount of paper-based copper-clad sheets. Although these substrates have excellent electrical properties and processing properties, they have poor heat dissipation. As a heat dissipation path for high-heating components, it is almost impossible to expect the PCB resin itself to conduct heat, but to dissipate heat from the surface of the component to the surrounding air. However, as electronic products have entered the era of component miniaturization, high-density installation, and high-heat assembly, it is not enough to rely solely on the surface of components with very small surface areas to dissipate heat. At the same time, due to the extensive use of surface-mounted components such as QFP and BGA, the heat generated by the components is transferred to the PCB board in large quantities. Therefore, the best way to solve the problem of heat dissipation is to improve the heat dissipation capacity of the PCB itself that is in direct contact with the heating components, through the PCB board Conduct or radiate out.

2. Add radiators and heat conduction plates to high-heating devices. When there are a few devices in the PCB that generate a large amount of heat (less than 3), you can add radiators or heat pipes to the heating devices. When the temperature still cannot drop, A radiator with a fan can be used to enhance the cooling effect. When there are a large number of heating devices (more than 3), a large heat dissipation cover (board) can be used. It is a special radiator customized according to the position and height of the heating device on the PCB board or a large flat-panel radiator. Cut out the high and low positions of different components. Attach the heat dissipation cover to the component surface and make contact with each component to dissipate heat. However, due to the poor consistency of the components during assembly and soldering, the heat dissipation effect is not good. Usually, a soft thermal phase change thermal pad is added to the component surface to improve the heat dissipation effect.

3. For equipment that uses free convection air cooling, it is best to arrange the integrated circuits (or other devices) vertically or horizontally.

4. Use reasonable wiring design to achieve heat dissipation. Since the resin in the board has poor thermal conductivity, and copper foil lines and holes are good conductors of heat, increasing the remaining rate of copper foil and increasing thermal holes are the main means of heat dissipation. To evaluate the heat dissipation capability of PCB, it is necessary to calculate the equivalent thermal conductivity (nine eq) of the insulating substrate for PCB, a composite material composed of various materials with different thermal conductivity.

5. Devices on the same printed board should be arranged according to their heat generation and heat dissipation degree as much as possible. Devices with small heat generation or poor heat resistance (such as small signal transistors, small-scale integrated circuits, electrolytic capacitors, etc.) should be placed In the uppermost part of the cooling airflow (at the entrance), devices with high calorific value or good heat resistance (such as power transistors, large-scale integrated circuits, etc.) are placed at the most downstream part of the cooling airflow.

6. In the horizontal direction, high-power devices should be arranged as close to the edge of the printed board as possible to shorten the heat transfer path; in the vertical direction, high-power devices should be arranged as close to the top of the printed board as possible to reduce the temperature impact of these devices on other devices when they are working. Impact.

7. The heat dissipation of the printed boards in the equipment mainly relies on air flow, so the air flow path must be studied during design and the devices or printed circuit boards should be reasonably configured. When air flows, it always tends to flow in places with low resistance, so when configuring devices on a printed circuit board, avoid leaving a large air space in a certain area. The same issue should also be paid attention to in the configuration of multiple printed circuit boards in the whole machine.

8. Devices that are sensitive to temperature are best placed in the area with the lowest temperature (such as the bottom of the device). Never place it directly above the heating device. It is best to arrange multiple devices staggered on the horizontal plane.

9. Place the devices with the highest power consumption and heat generation near the best heat dissipation location. Do not place high-heat components in the corners and edges of the printed board unless a heat sink is arranged nearby. When designing the power resistor, choose a larger device as much as possible, and make sure there is enough space for heat dissipation when adjusting the printed board layout.

10. Avoid the concentration of hot spots on the PCB, distribute the power evenly on the PCB as much as possible, and keep the PCB surface temperature performance uniform and consistent. It is often difficult to achieve strict uniform distribution during the design process, but areas with too high power density must be avoided to prevent hot spots from affecting the normal operation of the entire circuit. If possible, it is necessary to conduct thermal efficiency analysis of printed circuits. For example, the thermal efficiency index analysis software module added to some professional PCB design software can help designers optimize circuit design.

PCB wiring layout tips for beginners

As an electronic engineer, designing circuits is a necessary and hard skill, but no matter how perfect the principle design is, if the circuit board design is unreasonable, the performance will be greatly reduced, and in serious cases, it may not even work properly.

No matter what software is used, there is a general procedure for PCB design. Going in order will save time and effort, so I will introduce it according to the production process. (Because the Protel interface style is close to that of Windows, the operating habits are also similar, and it has powerful simulation functions, so many people use it, so this software will be used as an explanation.)

Schematic design is the preliminary preparation work. It is often seen that beginners directly draw the PCB board to save trouble. This will not be worth the gain. For simple boards, if you are familiar with the process, you may as well skip it. But for beginners, they must follow the process. On the one hand, they can develop good habits. On the other hand, this is the only way to avoid making mistakes with complex circuits.

When drawing schematic diagrams, when designing hierarchies, attention should be paid to the final connection of each file into a whole, which is also of great significance for future work. Due to differences in software, some software may appear to be connected but actually not connected (in terms of electrical performance). If you don’t use relevant testing tools to detect it, if something goes wrong, it will be too late until the board is ready. Therefore, I have repeatedly emphasized the importance of doing it in order, hoping to attract everyone’s attention.

The schematic diagram is based on the designed project. As long as the electrical connections are correct, there is nothing much to say. Below we focus on discussing the specific issues in the board making process.

1. Make physical borders

The closed physical border is a basic platform for future component layout and wiring, and also constrains automatic layout. Otherwise, the components coming from the schematic diagram will be at a loss. But you must pay attention to accuracy here, otherwise you will be in trouble if there are installation problems in the future. In addition, it is best to use arcs at corners. On the one hand, it can avoid sharp corners from scratching workers, and at the same time, it can reduce stress. In the past, one of my products always had the case PCB board broken during transportation. It was fine after using arc.

2. Introduction of components and networks

It should be very simple to introduce components and networks into the drawn borders, but problems often arise here. You must carefully follow the errors prompted to solve them one by one, otherwise you will have to spend more effort later. The problems here generally include the following:

The packaging form of the component cannot be found, there is a component network problem, there are unused components or pins, the comparison prompts that these problems can be solved quickly.

3. Component layout

The layout and wiring of components have a great impact on the product’s life, stability, and electromagnetic compatibility, and should be paid special attention to. Generally speaking, there should be the following principles:

(1) Placement order

First place the fixed-position components related to the structure, such as power sockets, indicator lights, switches, connectors, etc. After placing these components, use the LOCK function of the software to lock them so that they will not be moved accidentally in the future. Then place special components and large components on the circuit, such as heating components, transformers, ICs, etc. Place the widget last.

(2) Pay attention to heat dissipation

The component layout should also pay special attention to heat dissipation issues. For high-power circuits, heating components such as power tubes and transformers should be placed as far apart as possible to facilitate heat dissipation. Do not concentrate them in one place, and do not have high capacitances too close to avoid premature aging of the electrolyte.

4. wiring

Wiring principles

The knowledge of routing is very profound, and everyone will have their own experience, but there are still some general principles.

◆It is better for high-frequency digital circuit traces to be thinner and shorter.

◆Attention should be paid to the isolation between large current signals, high voltage signals and small signals (the isolation distance is related to the withstand voltage to be withstood. Normally at 2KV, the distance between the boards should be 2mm, and the distance above this should be increased proportionally. , for example, if it wants to withstand the 3KV withstand voltage test, the distance between high and low voltage lines should be more than 3.5mm. In many cases, in order to avoid creepage, slots are also made between high and low voltage on the printed circuit board.)

◆When wiring two panels, the wires on both sides should be routed perpendicularly, obliquely, or bent to avoid being parallel to each other to reduce parasitic coupling; printed wires used as input and output of the circuit should avoid adjacent parallel lines as much as possible. , to avoid feedback, it is best to add a ground wire between these wires.

◆Make the wiring corners larger than 90 degrees as much as possible, avoid corners below 90 degrees, and use 90-degree corners as little as possible

◆If they are both address lines or data lines, the length of the lines should not be too different, otherwise the short lines will need to be artificially bent to compensate.

◆Try to run the traces on the welding surface as much as possible, especially for PCBs with through-hole technology

◆Use as few vias and jumpers as possible

◆The soldering pads of single-sided panels must be large, and the wires connecting the pads must be thick. Use teardrops if you can. The quality of ordinary single-sided panel manufacturers will not be very good, otherwise there will be problems with welding and RE-WORK.

◆Large areas of copper should be covered in a grid pattern to prevent the board from generating bubbles and bending due to thermal stress during wave soldering. However, in special occasions, the flow direction and size of the GND must be considered, and it cannot simply be filled with copper foil. , but need to route

◆Components and wiring should not be placed too close to the edge. Common single panels are mostly made of paper boards, which are easy to break after being stressed. If you connect wires or place components at the edge, they will be affected.

◆The convenience of production, debugging and maintenance must be considered

It is very important to deal with ground issues for analog circuits. Noise generated on the ground is often unpredictable, but once it occurs, it will cause great trouble and should be avoided. For power amplifier circuits, extremely small ground noise will have a significant impact on the sound quality due to the amplification of the subsequent stages; in high-precision A/D conversion circuits, if there are high-frequency components on the ground line, there will be a certain temperature drift, which will affect the sound quality. Amplifier work. At this time, you can add decoupling capacitors to the 4 corners of the board, connect one leg to the ground on the board, and connect the other leg to the mounting hole (connected to the chassis through screws), so that this component can be eliminated, and the amplifier and AD can also It’s stable.

In addition, the issue of electromagnetic compatibility has become even more important now that people are paying more attention to environmentally friendly products. Generally speaking, there are three sources of electromagnetic signals: signal source, radiation, and transmission line. Crystal oscillator is a common high-frequency signal source. In the power spectrum, the energy value of each harmonic of the crystal oscillator will be significantly higher than the average value. A feasible approach is to control the amplitude of the signal, ground the crystal oscillator shell, shield the interference signal, and use special filter circuits and devices.

What needs special explanation is the snake-shaped wiring, because its functions are different depending on the application. It is used on some clock signals in the computer motherboard, such as PCIClk and AGP-Clk. It has two functions: 1. Impedance matching 2. Filter inductor.

For some important signals, such as the HUBLink in the INTELHUB architecture, there are 13 wires in total and the frequency can reach 233MHZ. They must be strictly equal in length to eliminate the hidden dangers caused by time lag. At this time, snake wiring is the only solution.

Generally speaking, the line spacing of snake-shaped traces is >= 2 times the line width; if it is used in an ordinary PCB board, in addition to having the function of a filter inductor, it can also be used as an inductor coil of a radio antenna, etc.

5. Adjustment and improvement

After completing the wiring, all that needs to be done is to make some adjustments to the text, individual components, and wiring and apply copper (this work should not be done too early, otherwise it will affect the speed and cause trouble to the wiring), also for the convenience of production, Debugging and maintenance.

Copper coating usually refers to filling the blank area left after wiring with a large area of copper foil. You can lay GND copper foil or VCC copper foil (but this will easily burn the device in the event of a short circuit. It is best to ground it unless you have to. To increase the conduction area of the power supply to withstand larger current, connect to VCC). Ground wrapping usually refers to wrapping a bunch of signal lines with special requirements with two ground wires (TRAC) to prevent them from being interfered by or interfering with others.

If you use copper instead of ground wire, you must pay attention to whether the entire ground is connected, the current size, flow direction, and whether there are any special requirements to ensure that unnecessary mistakes are reduced.

6. Check the network

Sometimes due to misoperation or negligence, the network relationship of the drawn board is different from the schematic diagram. In this case, it is necessary to check. Therefore, after finishing the painting, you must not rush to hand it over to the plate maker. You should check it first and then proceed with the follow-up work.

7. Use the simulation function

After completing these tasks, if time permits, software simulation can also be performed. Especially for high-frequency digital circuits, some problems can be discovered in advance and greatly reduce the workload of debugging in the future.

As an electronic engineer, designing circuits is a necessary and hard skill, but no matter how perfect the principle design is, if the circuit board design is unreasonable, the performance will be greatly reduced, and in serious cases, it may not even work properly. Based on my experience, I have summarized the following things that should be paid attention to in PCB design. I hope it can inspire you.

No matter what software is used, there is a general procedure for PCB design. Going in order will save time and effort, so I will introduce it according to the production process. (Because the Protel interface style is close to that of Windows, the operating habits are also similar, and it has powerful simulation functions, so many people use it, so this software will be used as an explanation.)

Schematic design is the preliminary preparation work. It is often seen that beginners directly draw the PCB board to save trouble. This will not be worth the gain. For simple boards, if you are familiar with the process, you may as well skip it. But for beginners, they must follow the process. On the one hand, they can develop good habits. On the other hand, this is the only way to avoid making mistakes with complex circuits.

When drawing schematic diagrams, when designing hierarchies, attention should be paid to the final connection of each file into a whole, which is also of great significance for future work. Due to differences in software, some software may appear to be connected but actually not connected (in terms of electrical performance). If you don’t use relevant testing tools to detect it, if something goes wrong, it will be too late until the board is ready. Therefore, I have repeatedly emphasized the importance of doing it in order, hoping to attract everyone’s attention.

The schematic diagram is based on the designed project. As long as the electrical connections are correct, there is nothing much to say. Below we focus on discussing the specific issues in the board making process.

1. Make physical borders

The closed physical border is a basic platform for future component layout and wiring, and also constrains automatic layout. Otherwise, the components coming from the schematic diagram will be at a loss. But you must pay attention to accuracy here, otherwise you will be in trouble if there are installation problems in the future. In addition, it is best to use arcs at corners. On the one hand, it can avoid sharp corners from scratching workers, and at the same time, it can reduce stress. In the past, one of my products always had the case PCB board broken during transportation. It was fine after using arc.

2. Introduction of components and networks

It should be very simple to introduce components and networks into the drawn borders, but problems often arise here. You must carefully follow the errors prompted to solve them one by one, otherwise you will have to spend more effort later. The problems here generally include the following:

The packaging form of the component cannot be found, there is a component network problem, there are unused components or pins, the comparison prompts that these problems can be solved quickly.

3. Component layout

The layout and wiring of components have a great impact on the product’s life, stability, and electromagnetic compatibility, and should be paid special attention to. Generally speaking, there should be the following principles:

(1) Placement order

First place the fixed-position components related to the structure, such as power sockets, indicator lights, switches, connectors, etc. After placing these components, use the LOCK function of the software to lock them so that they will not be moved accidentally in the future. Then place special components and large components on the circuit, such as heating components, transformers, ICs, etc. Place the widget last.

(2) Pay attention to heat dissipation

The component layout should also pay special attention to heat dissipation issues. For high-power circuits, heating components such as power tubes and transformers should be placed as far apart as possible to facilitate heat dissipation. Do not concentrate them in one place, and do not have high capacitances too close to avoid premature aging of the electrolyte.

4. wiring

Wiring principles

The knowledge of routing is very profound, and everyone will have their own experience, but there are still some general principles.

◆It is better for high-frequency digital circuit traces to be thinner and shorter.

◆Attention should be paid to the isolation between large current signals, high voltage signals and small signals (the isolation distance is related to the withstand voltage to be withstood. Normally at 2KV, the distance between the boards should be 2mm, and the distance above this should be increased proportionally. , for example, if it wants to withstand the 3KV withstand voltage test, the distance between high and low voltage lines should be more than 3.5mm. In many cases, in order to avoid creepage, slots are also made between high and low voltage on the printed circuit board.)

◆When wiring two panels, the wires on both sides should be routed perpendicularly, obliquely, or bent to avoid being parallel to each other to reduce parasitic coupling; printed wires used as input and output of the circuit should avoid adjacent parallel lines as much as possible. , to avoid feedback, it is best to add a ground wire between these wires.

◆Make the wiring corners larger than 90 degrees as much as possible, avoid corners below 90 degrees, and use 90-degree corners as little as possible

◆If they are both address lines or data lines, the length of the lines should not be too different, otherwise the short lines will need to be artificially bent to compensate.

◆Try to run the traces on the welding surface as much as possible, especially for PCBs with through-hole technology

◆Use as few vias and jumpers as possible

◆The soldering pads of single-sided panels must be large, and the wires connecting the pads must be thick. Use teardrops if you can. The quality of ordinary single-sided panel manufacturers will not be very good, otherwise there will be problems with welding and RE-WORK.

◆Large areas of copper should be covered in a grid pattern to prevent the board from generating bubbles and bending due to thermal stress during wave soldering. However, in special occasions, the flow direction and size of the GND must be considered, and it cannot simply be filled with copper foil. , but need to route

◆Components and wiring should not be placed too close to the edge. Common single panels are mostly made of paper boards, which are easy to break after being stressed. If you connect wires or place components at the edge, they will be affected.

◆The convenience of production, debugging and maintenance must be considered

It is very important to deal with ground issues for analog circuits. Noise generated on the ground is often unpredictable, but once it occurs, it will cause great trouble and should be avoided. For power amplifier circuits, extremely small ground noise will have a significant impact on the sound quality due to the amplification of the subsequent stages; in high-precision A/D conversion circuits, if there are high-frequency components on the ground line, there will be a certain temperature drift, which will affect the sound quality. Amplifier work. At this time, you can add decoupling capacitors to the 4 corners of the board, connect one leg to the ground on the board, and connect the other leg to the mounting hole (connected to the chassis through screws), so that this component can be eliminated, and the amplifier and AD can also It’s stable.

In addition, the issue of electromagnetic compatibility has become even more important now that people are paying more attention to environmentally friendly products. Generally speaking, there are three sources of electromagnetic signals: signal source, radiation, and transmission line. Crystal oscillator is a common high-frequency signal source. In the power spectrum, the energy value of each harmonic of the crystal oscillator will be significantly higher than the average value. A feasible approach is to control the amplitude of the signal, ground the crystal oscillator shell, shield the interference signal, and use special filter circuits and devices.

What needs special explanation is the snake-shaped wiring, because its functions are different depending on the application. It is used on some clock signals in the computer motherboard, such as PCIClk and AGP-Clk. It has two functions: 1. Impedance matching 2. Filter inductor.

For some important signals, such as the HUBLink in the INTELHUB architecture, there are 13 wires in total and the frequency can reach 233MHZ. They must be strictly equal in length to eliminate the hidden dangers caused by time lag. At this time, snake wiring is the only solution.

Generally speaking, the line spacing of snake-shaped traces is >= 2 times the line width; if it is used in an ordinary PCB board, in addition to having the function of a filter inductor, it can also be used as an inductor coil of a radio antenna, etc.

5. Adjustment and improvement

After completing the wiring, all that needs to be done is to make some adjustments to the text, individual components, and wiring and apply copper (this work should not be done too early, otherwise it will affect the speed and cause trouble to the wiring), also for the convenience of production, Debugging and maintenance.

Copper coating usually refers to filling the blank area left after wiring with a large area of copper foil. You can lay GND copper foil or VCC copper foil (but this will easily burn the device in the event of a short circuit. It is best to ground it unless you have to. To increase the conduction area of the power supply to withstand larger current, connect to VCC). Ground wrapping usually refers to wrapping a bunch of signal lines with special requirements with two ground wires (TRAC) to prevent them from being interfered by or interfering with others.

If you use copper instead of ground wire, you must pay attention to whether the entire ground is connected, the current size, flow direction, and whether there are any special requirements to ensure that unnecessary mistakes are reduced.

6. Check the network

Sometimes due to misoperation or negligence, the network relationship of the drawn board is different from the schematic diagram. In this case, it is necessary to check. Therefore, after finishing the painting, you must not rush to hand it over to the plate maker. You should check it first and then proceed with the follow-up work.

7. Use the simulation function

After completing these tasks, if time permits, software simulation can also be performed. Especially for high-frequency digital circuits, some problems can be discovered in advance and the future debugging workload can be greatly reduced.

Several types of glue are commonly used for circuit boards. How many do you know?

1. Red glue
Red glue is a polyolefin compound that easily solidifies when heated. When the temperature reaches the freezing point of 150°C, red glue begins to change from a paste to a solid. This characteristic can be used for dispensing or printing. To fix the chip components, the circuit board components can be heated and cured through oven or reflow soldering using SMD red glue.

The components on the circuit board, especially the double-sided mounted circuit board, are fixed with SMD red glue during wave soldering, so that the small SMD components on the back will not fall into the tin furnace. Red glue has several major features:

① Stable adhesion strength can be obtained for various chip components;
② It has viscosity and thixotropy suitable for screen printing needs, and the amount of glue is stable without leakage or tower edges;
③Has good storage stability;
④ It has high adhesive strength and can avoid component misalignment during high-speed placement.

Main function: The main function of red glue is to fix circuit board patch components, mainly for bonding, or used together with solder paste for reinforcing fixation.

2. Yellow gum
Yellow glue used in circuit boards is a water-based adhesive with a pungent odor. It is a soft self-adhesive gel that has excellent insulation, moisture-proof, shock-proof and thermal conductivity properties, making electronic components The device operates safely under harsh conditions.
It is prone to curing, and the curing speed is related to the ambient temperature, humidity and wind speed: the higher the temperature, the lower the humidity, the greater the wind speed, the faster the curing speed, and vice versa. When the painted parts are placed in the air, skin will slowly form. Please note that the operation should be completed before the surface forms skin.

Main functions: Fixing electronic products such as inductors, coils, transformers, electrolytic capacitors, receivers, etc. It has the function of protecting and sealing electronic components. It can be used for potting of electrical components, potting of high-voltage components, moisture-proof coating of circuit boards, etc.

3. Thermal conductive silicone
Thermal conductive silicone, also known as thermal paste and heat dissipation paste, is a highly thermally conductive insulating silicone material. Unlike thermal conductive silicone grease, which almost never solidifies, it can also maintain the grease during use for a long time at temperatures of -50°C to +250°C. state. It has both excellent electrical insulation and thermal conductivity, low oil dissociation (trends to zero), high and low temperature resistance, water resistance, ozone resistance, and weather aging resistance. It is characterized by being non-toxic, odorless and non-corrosive, compliant with ROHS standards and related environmental protection requirements, and has stable chemical and physical properties.

Main function: used to fill the gap between the heating element and the heat dissipation device, increase their contact area, thereby achieving the best thermal conductivity effect, so that the heat of the electronic components can be effectively dissipated and transferred when the electronic components are working.

It is widely coated on the contact surface between the heating element (power tube, thyristor, electric heating pile, etc.) and the heat dissipation facilities (heat sink, heat strip, shell, etc.) in various electronic products and electrical equipment to initiate heat transfer. The media function can improve the heat dissipation effect.

4. Silicone glue
Silicone glue is an ointment-like material that solidifies into a tough, rubber-like solid once exposed to moisture in the air. Silicone glue is commonly known as glass glue because it is often used for bonding and sealing glass. The glue should be stored sealed. The mixed rubber should be used up at one time to avoid waste.

Main function: widely used in electronic modules, sensors, electronic components and other occasions that require encapsulation, insulation, flame retardancy, as well as bonding of electronic components and insulation between fixed components.

5. Hot melt adhesive
Hot melt adhesive strip is a solid adhesive made of ethylene-vinyl acetate polymer (EVA) as the main material, modified rosin resin or petroleum resin and other ingredients. It is a plastic, non-toxic, tasteless, green and environmentally friendly adhesive. Adhesive, the physical state of hot melt adhesive changes with temperature changes within a certain temperature range, while the chemical properties remain unchanged. It does not contain water or solvent at all, and has the characteristics of fast bonding, high strength, aging resistance, non-toxicity, good thermal stability, and film toughness.

Heat the hot melt adhesive to the usage temperature, use a spray gun or apply it on the adherend. The bonding and shaping work must be completed within the opening time of the glue, and the adherend should be clamped and cooled to normal temperature. Hot melt adhesive is solid at the right temperature, melts into liquid when heated, and is bonded within a few seconds after cooling at room temperature. It can effectively fix electronic components and wiring harnesses.

Main functions: Hot melt adhesive is suitable for fixing electronic components, bonding electronic wiring, and can also be used for bonding other electronic materials. It can even be used to bond handicrafts, packaging cartons, jewelry, handicrafts, wood, textile samples, etc. to each other.

Starting from PCB design, signal integrity is no longer difficult!

In the world of electronics design, high-performance design has its own unique challenges.

1 The birth of high-speed design

In recent years, the increasing number of high-frequency signal designs has been closely linked to the steadily increasing performance of electronic systems.

As system performance improves, the challenges for PCB designers are increasing day by day: smaller chips, denser circuit board layout, and lower power consumption chip requirements.

With the rapid development of all technologies, we are at the core of high-speed design and need to consider its complexity and all factors.

2 review

PCB design has changed a lot over the past 30 years. In 1987, we thought 0.5 micron was the end of the technology, but today, 22nm has become the norm.

As shown in the figure below, the edge rate in 1985 promoted the increase in design complexity (typically 30 nanoseconds), and today the edge rate has become 1 nanosecond.
图片

Changes in marginal rates over the past 30 years.

3 Technological progress is accompanied by various problems

The advancement of technology is always accompanied by a series of problems. As system performance increases and high-speed designs are adopted, some issues must be addressed in the design environment.

Below, we summarize the challenges faced:

Signal quality

IC manufacturers favor lower core voltages and higher operating frequencies, which results in sharply rising edge rates. Edge rates in unterminated designs will cause reflections and signal quality issues.

crosstalk

In high-speed signal designs, dense paths often lead to crosstalk—the phenomenon associated with electromagnetic coupling between traces on a PCB.

Crosstalk can be edge coupling of traces on the same layer or broadside coupling on adjacent layers.

The coupling is three-dimensional. Parallel paths and wide-side traces cause more crosstalk than side-by-side trace paths.

图片

Broadside coupling (top) compared to edge coupling (bottom)

Fast edge rates in traditional designs can cause ringing on unterminated transmission lines, even when using the same frequency and trace length as before.

This essentially results in higher emissions, well in excess of the FCC/CISPR Class B limits for unterminated transmission lines.

图片

Edge rate radiation at 10 nanoseconds (left) and 1 nanosecond (right).

4 Design Solutions

Signal and power integrity issues occur intermittently and are difficult to diagnose. Therefore, the best way is to find the root cause of the problem during the design process and eliminate it, rather than trying to solve it in the later stages and delaying production.

The stackup planning tool makes it easier to implement solutions to signal integrity issues in your design.

5 Circuit board stackup planning

The number one priority in high-speed design must be circuit board stackup. The substrate is the most important component of the assembly, and its specifications must be carefully planned to avoid discontinuous impedance, signal coupling, and excessive electromagnetic radiation.

When looking at the circuit board stackup for your next design, keep these tips and suggestions in mind:
All signal layers need to be adjacent and tightly coupled to an uninterrupted reference plane that creates a clear loop and eliminates broadside crosstalk.

图片

The substrate of each signal layer is adjacent to the reference plane.

There are good planar capacitors to reduce AC impedance in high frequencies. The tightly coupled inner electrical layer plane reduces the AC impedance of the top layer and greatly reduces electromagnetic radiation.

Reducing the dielectric height significantly reduces crosstalk without impacting the available space on the board.

The substrate should be able to accommodate a range of different technologies. For example: 50/100 ohm digital, 40/80 ohm DDR4, 90 ohm USB.

6 Cabling and Workflow

With your stackup carefully planned, the next step is to focus on board routing. Based on design rules and careful configuration of your work area, you can route your board most efficiently and successfully.

These tips can help make your wiring easier and avoid unnecessary crosstalk, radiation, and signal quality problems:

Simplify the view to clearly see the split planes and current loops.

To do this, first determine which copper foil plane (ground or power) serves as the reference plane for each signal layer, and then open the signal layer and internal electrical layer planes to view them at the same time. This helps you more easily see the traces that split the plane.

图片

Multiple signal layers (left), top and adjacent plane views (right)

If a digital signal must cross a power reference plane, you can place one or two decoupling capacitors (100nF) close to the signal. This provides a current loop between the two power supplies.

Avoid parallel routing and broadside routing, which can cause more crosstalk than side-by-side routing.

Unless you are using a synchronous bus, keep the parallel intervals as short as possible to reduce crosstalk. Leave room for signal groups so that their address and data spacing is three times the trace width.

Be careful when using combined microstrip layers on the top and bottom layers of the board. This can lead to crosstalk between traces on adjacent board layers, compromising signal integrity.

Routing the clock (or strobe) signal with the longest delay by signal group ensures that the data has been established before the clock is read.

Routing embedded signals between planes helps minimize radiation and provides ESD protection.

7 Signal clarity

In the future, the complexity of electronic design will undoubtedly continue to increase, which will bring a series of challenges to PCB designers that need to be solved. Ensuring the correct configuration of circuit board stackup, impedance, and current loops is the basis for design stability.

High-speed PCB board material selection guide: how to make the best decision?

In modern electronic equipment, high-speed PCB circuit boards are increasingly used. In order to achieve higher signal transmission rates and lower signal loss, it is crucial to select the appropriate board material. This article will introduce you to some factors to help you make the correct PCB board material selection decision to ensure the stability and optimization of circuit performance.

1. Understand the characteristics of high-speed PCB boards
Before choosing high-speed PCB boards, you first need to understand the characteristics of different boards. Common high-speed PCB boards include FR-4, PTFE, Rogers, etc. Each type of plate has different characteristics such as dielectric constant, thermal expansion coefficient, and temperature resistance. When selecting a board material, you need to determine which properties are more important based on the needs of the specific application.

2. Consider signal transmission rate
High-speed PCB circuit boards usually need to transmit high-frequency signals, so the dielectric constant of the board is crucial to the signal transmission rate. A lower dielectric constant can reduce signal propagation delays and losses and improve circuit performance. Therefore, choosing a plate with a lower dielectric constant is a wise choice.

3. Consider the thermal expansion coefficientThe coefficient of thermal expansion refers to the degree of dimensional change of a material when the temperature changes. In high-speed PCB circuit board design, temperature changes may cause dimensional changes in the board, thereby affecting the stability of the circuit. Therefore, choosing a sheet with a smaller coefficient of thermal expansion can reduce problems caused by temperature changes.

4. Consider temperature resistance
High-speed PCB circuit boards usually need to operate at higher temperatures, so the temperature resistance of the board is also a key consideration. Choosing boards with higher temperature resistance can ensure the reliability and stability of the circuit in high-temperature environments.

5. Work with suppliers
When selecting high-speed PCB board materials, it is very important to work with reliable suppliers. They can provide you with professional advice and technical support, and provide high-quality boards that meet quality standards. Establishing long-term relationships with suppliers ensures you receive ongoing technical support and quality products.

Choosing the right high-speed PCB board material is crucial to the stability and optimization of circuit performance. When selecting materials, factors such as the characteristics of the board, signal transmission rate, thermal expansion coefficient, and temperature resistance need to be considered. It is also important to work with reliable suppliers and obtain professional advice and support. By carefully considering these factors, you will be able to make the correct PCB board material selection decision, improving your circuit performance and overall product quality.

How to use high-speed PCB prototyping to improve product performance?

In the rapid development of modern electronic products, high-speed PCB proofing has become a key part of improving product performance. This article will introduce to you how to improve product performance through high-speed PCB proofing.

1. Understand the concept and significance of high-speed pcb prototyping
In electronic product design, high-speed PCB prototyping refers to the use of high-performance materials, precision processes and advanced equipment when designing and manufacturing PCB boards to meet high-speed signal transmission, anti-interference ability and stability requirements. Through high-speed PCB prototyping, signal transmission delay and signal distortion can be effectively reduced, and the reliability and stability of the product can be improved.

2. Choose suitable high-speed PCB materials
Choosing suitable high-speed PCB materials is an important step to ensure product performance improvement. Common high-speed PCB materials include FR-4, Rogers, PTFE, etc. According to the specific needs of the product, the dielectric constant, loss factor and thermal stability of the material are selected to meet the requirements of high-speed signal transmission.

3. Optimize PCB layout and routing
When performing high-speed PCB prototyping, reasonable layout and wiring design can significantly improve product performance. Try to shorten the signal transmission path as much as possible to reduce signal loss; avoid excessive plane layering to reduce signal crosstalk and interference. In addition, the ground wire and power wire should be properly set up to provide good ground potential and power supply stability.

4. Pay attention to the details in high-speed PCB proofing
When performing high-speed PCB prototyping, you also need to pay attention to some details to ensure the improvement of product performance. Choose the appropriate PCB manufacturer to ensure that it has advanced production equipment and rich experience; conduct strict process control, including controlling the accuracy of parameters such as board thickness, line width, line spacing; and conduct necessary testing and verification to ensure that the product The quality and performance meet expectations.

Using high-speed PCB proofing can significantly improve product performance, thereby achieving better user experience and market competitiveness. By choosing the right materials, optimizing layout and trace design, and paying attention to detail and process control, you can maximize product performance.

Revealing the difference between high-frequency PCB and ordinary PCB, do you really understand it?

In the electronics industry, PCB (Printed Circuit Board) is an important component, which carries electronic components and provides connection functions. In the world of PCB, high-frequency PCB and ordinary PCB are two common concepts. However, do you really know the difference between them? This article will reveal the differences between high-frequency PCBs and ordinary PCBs to help you understand them better.

Material selection: High-frequency PCB requires the use of special materials with low dielectric constant and low loss tangent to support higher frequency signal transmission and faster data processing. Ordinary PCBs may use conventional FR-4 materials or other more common materials.
Hierarchical structure: High-frequency PCBs may adopt more hierarchical structures to achieve complex signal stacking and impedance matching. In comparison, a normal PCB may require less hierarchical structure.

Layout and wiring: The layout and wiring of high-frequency PCBs need to be more precise and rigorous to minimize signal path length, signal distortion and crosstalk. The layout and wiring of ordinary PCB may be relatively more flexible and simple.

Impedance control: High-frequency PCBs need to strictly control the impedance matching of signal transmission lines to ensure stable signal transmission. In comparison, ordinary PCBs may have less stringent requirements for impedance control.

Testing requirements: The testing requirements for high-frequency PCBs are more stringent, and more advanced testing equipment and technologies are usually required to ensure the accuracy and stability of signal transmission. The testing requirements for ordinary PCBs may be relatively simple and straightforward.

Cost and manufacturing process: Because high-frequency PCBs have higher requirements on materials, processes, and testing, manufacturing costs may be higher. The manufacturing cost of ordinary PCB is relatively low, and the manufacturing process is relatively simple.

In general, there are some differences between high-frequency PCBs and ordinary PCBs in terms of material selection, hierarchical structure, layout and wiring, impedance control, testing requirements and manufacturing costs. High-frequency PCBs are more specialized and complex and are suitable for application scenarios with higher signal transmission requirements, while ordinary PCBs are more versatile and suitable for general electronic product manufacturing. By understanding these differences, it helps us better select and apply suitable PCBs and improve the performance and stability of electronic equipment.