What is the difference between high-frequency circuit boards and ordinary circuit boards? Comprehensive analysis of advantages and disadvantages!

The frequency circuit board has a higher operating frequency and lower signal distortion rate, but the manufacturing cost is higher and the manufacturing is more difficult. Ordinary circuit boards are relatively low-cost and simple to manufacture, but they cannot meet the working requirements of high-frequency circuits. This article comprehensively explains the differences and characteristics of these two circuit boards through comparisons in technical principles, material differences, design standards, manufacturing difficulty and other aspects.

1. Technical principles

The main difference between high-frequency circuit boards and ordinary circuit boards lies in the processing of electrical signals. In high-frequency circuits, the frequency of electronic signals exceeds 1MHz. At this time, the signal has extremely high frequency and transient response speed. Ordinary circuits can process low-frequency signals and process electrical signals in the range below 1MHz. Because the signal processing requirements of high-frequency circuits are more stringent, circuit boards equipped with high-frequency circuits are endowed with special capabilities such as high interconnection and low noise. Therefore, in order to ensure the normal operation of high-frequency circuit boards, high-frequency circuit boards need to have higher design and manufacturing standards.

2. Material differences

High-frequency circuit boards must be made of high-quality materials to meet their high-speed transmission-related properties. High-frequency circuit boards usually use silicone resin or PTFE (polytetrafluoroethylene) as the substrate material. In contrast, ordinary circuit boards generally use fiberglass, epoxy boards or multi-layer boards as the substrate materials. Among high-frequency materials, silicone and PTFE have the characteristics of lower performance loss, good high-frequency dielectric properties and excellent mechanical strength, while glass fiber and epoxy do not have such superior properties.

3. Design standards

The design standards of high-frequency circuit boards are relatively high, and it is necessary to fully consider the influence of the size of the circuit board, the position of the components and the board structure. In the PCB design of high-frequency circuit boards, design factors such as circuit trace width, line spacing, interlayer secants, no long ground and distributed capacitance need to be considered. Therefore, please note that great care must be taken during the design development of high-frequency circuit boards to ensure the reliability and quality of their functionality.

4. Manufacturing difficulty

The manufacturing of high-frequency circuit boards requires the use of more complex processing, production and testing equipment, with higher manufacturing standards and technical requirements. Factors such as narrow circuit traces and apertures, higher precision, and concise circuits make high-frequency circuit boards more difficult to manufacture and the manufacturing cost is relatively high. But once these requirements are met, more accurate results and lower signal distortion rates can be achieved.

High-frequency circuit boards have higher operating frequencies and lower signal distortion rates, so they are suitable for products in the fields of high-speed communications, wireless communications, and high-frequency applications. At the same time, the manufacturing cost of high-frequency circuit boards is relatively high, and the design is also difficult. Ordinary circuit boards are relatively low-cost and simple to manufacture, but they cannot meet the working requirements of high-frequency circuits, so they can only be used in applications with lower operating frequencies.

Revealing the safety processes and guarantees in aircraft circuit board manufacturing!

As an important component of aircraft circuit boards, the safety during their manufacturing process is of utmost importance. Through strict processes and safeguards, we can ensure reliable quality and stable performance of circuit boards, thereby ensuring flight safety.

1. Raw material selection and management
The first step in aircraft circuit board manufacturing is raw material selection and management. The most basic raw material for circuit boards is the printed circuit board substrate, and its quality directly affects the performance of the entire circuit board. When selecting a substrate material, factors such as its conductive properties, insulation properties, high temperature resistance, and chemical stability need to be considered to ensure the stability and reliability of the circuit board in different environments. In addition, we must pay attention to the compliance of raw materials and follow relevant national and industry standards and regulations to ensure the safety of circuit boards.

2. Manufacturing process and quality control
During the manufacturing process of aircraft circuit boards, a series of processes and quality control requirements need to be strictly followed. This includes design, plate making, printing, curing, electroplating, assembly and other links. Each link has corresponding process requirements and inspection standards to ensure that each step complies with specifications and eliminate possible defects and failures. For example, during the plate making process, it is necessary to ensure the accuracy and consistency of the drawings to avoid failures caused by design errors on the circuit board. In the electroplating process, the concentration and temperature of the plating solution need to be controlled to ensure the uniformity and adhesion of the metal layer.

3.Quality inspection and testing
Quality inspection and testing are important aspects to ensure the quality of aircraft circuit boards. After manufacturing is complete, the circuit board needs to undergo comprehensive quality inspection and testing to verify its performance and reliability. This includes visual inspection, dimensional measurement, electrical performance testing, reliability testing and many other aspects. Through these inspections and tests, potential defects and problems can be discovered, and repairs and adjustments can be made in a timely manner to ensure that the circuit board meets the design requirements and meets the performance and safety requirements related to the aircraft.

4. Traceability and management system
During the manufacturing process of aircraft circuit boards, a complete traceability and management system needs to be established. This includes effective traceability and management of raw materials, process parameters, quality records and other information. Through the traceability and management system, the entire manufacturing process can be recorded for subsequent follow-up and problem tracing. This is of great significance for discovering and solving potential problems and improving the quality and reliability of circuit board manufacturing.

Through the effective use and implementation of raw material selection and management, manufacturing process and quality control, quality inspection and testing, and traceability and management systems, the reliable quality and stable performance of aircraft circuit boards can be ensured. This not only ensures flight safety, but also provides reliable technical support for the normal operation of the aircraft. Therefore, in the manufacturing of aircraft circuit boards, great attention should be paid to the implementation of safety processes and guarantees, and continuous optimization and improvement should be made to ensure that every link of casting flight trust is effectively guaranteed.

What are the three-proof standards for aerospace circuit boards?

Aerospace circuit boards are one of the important components in the aerospace industry. This article will comprehensively analyze the three-proof standards for aerospace circuit boards, namely moisture-proof, salt spray-proof, and mildew-proof. Implementation of these standards is critical to ensuring flight safety. The reasonable design and implementation of moisture-proof, salt-spray-proof, and mildew-proof measures can greatly improve the stability and reliability of circuit boards, thereby ensuring the normal operation of the aircraft.

1. Moisture-proof
Moisture resistance is an important issue that must be considered in the design of aerospace circuit boards. In a humid environment, circuit boards are easily corroded by moisture, leading to reduced performance of electronic components and even short-circuit failures. Therefore, it is necessary to take a series of moisture-proof measures to protect the circuit board. This includes selecting materials with good moisture-proof properties to manufacture circuit boards, such as high-performance glass fiber reinforced materials and plastic films that can effectively isolate moisture. Secondly, encapsulate the circuit board and use encapsulation materials with good moisture-proof properties, such as epoxy resin, etc. In addition, temperature and humidity must be strictly controlled during the welding process to reduce the impact of moisture on the circuit board.

2. Anti-salt spray
Aerospace circuit boards often need to work in marine environments or areas containing salt spray, and salt spray is very corrosive to circuit boards. Therefore, preventing salt spray corrosion has become one of the essential considerations in circuit board design. In order to improve the salt spray resistance of circuit boards, protective coating technology can be used. This coating is usually an epoxy resin or polyurethane material, which can effectively prevent salt spray from corroding circuit boards. At the same time, choosing metals with good corrosion resistance for connectors, lines and other components of circuit boards can delay the damage to circuit boards caused by salt spray. In addition, regular maintenance and cleaning to ensure that there are no salt spray deposits on the surface of the circuit board is also one of the effective measures to protect the circuit board.

3. Anti-mildew
In high-humidity environments, aerospace circuit boards are susceptible to mold attack, resulting in circuit board performance degradation or failure. Therefore, mildew prevention is an important part of ensuring long-term reliable operation of circuit boards. Make your circuit boards by choosing mildew-resistant materials. Such as using substrate materials with antifungal properties and antifungal agents. During production and storage, maintain appropriate temperature and humidity to avoid mold growth caused by excessive humidity. In addition, pay attention to the sealing performance of the circuit board to ensure that there are no cracks and holes to prevent mold from entering.

The three-proof standards for aerospace circuit boards, namely moisture-proof, salt-spray-proof and mildew-proof, play an important role in ensuring flight safety. By selecting materials with good moisture-proof properties, encapsulation processing, protective coating technology and other measures, the stability and reliability of the circuit board can be improved, allowing it to operate normally in harsh environments such as moisture, salt spray, and high humidity. The implementation of these measures requires strict quality control and maintenance plans to ensure that the circuit board can continue to work stably and provide reliable guarantee for flight.

Accurate to the point, super cost-effective! Medical circuit board customization price revealed!

Medical circuit board customization is one of the key links in the field of medical equipment. It embodies the requirements of precision and the pursuit of ultra-high cost performance. With the continuous development of medical technology, electronic components are increasingly used in medical equipment, and the price and quality of customized circuit boards directly affect the performance and reliability of medical equipment. This article will delve into the price of medical circuit board customization and elaborate on it from four aspects: cost, design, quality and market demand.

1. Cost control
The price of medical circuit board customization is first subject to cost factors. The procurement of electronic components, PCB manufacturing, patch welding, testing and inspection will all incur certain costs. Among them, the procurement of electronic components is an important part. The prices of components of different specifications, brands and quality levels vary greatly. The cost of equipment, labor and materials required in the manufacturing and assembly process also have an impact on the final price. Therefore, when customizing medical circuit boards, effective cost control is the key to ensuring reasonable prices.

2. Design requirements
Medical circuit board customization requires precision because the stability and reliability of medical equipment are crucial to the safety of patients. Design engineers need to carefully design circuit boards based on different medical equipment needs to ensure the stability and performance of each functional module. The complexity and technical requirements of the design will directly affect the price of medical circuit boards. At the same time, factors such as circuit board layout, heat dissipation, and EMC also need to be considered during the design stage to ensure the normal operation of medical equipment.

3. Quality Assurance
As a core component of medical equipment, medical circuit boards have particularly important quality requirements. During the production process, a strict quality management system needs to be followed to ensure product reliability and stability. This includes quality selection of parts, quality control of production lines, and environmental electrostatic protection. Through strict quality inspection and reliability testing, we ensure the quality of medical circuit boards and achieve long-term stable operation. However, in order to meet high-quality requirements, more costs are required for medical circuit board customization.

4. Market demand
The price of medical circuit board customization is also affected by market demand. The medical equipment market is highly competitive, and different manufacturers have different needs for product customization. Large medical equipment requires more complex circuit board design and higher quality assurance, so customization prices will be relatively high. The requirements for circuit boards for small medical equipment may be relatively simple, and the customization price is relatively low. At the same time, the market demand for medical circuit boards with special functions and high performance will also affect the price of customization.

The price of medical circuit board customization is affected by multiple factors. When customizing medical circuit boards, manufacturers need to fully consider these factors and, while meeting performance and quality requirements, try to control costs to provide products with ultra-high cost performance. Only in this way can the customized price of medical circuit boards truly meet market demand and play its important role in medical equipment.

Differences between PCB positive and negative film processes.

PCB positive and negative films are two important steps in the PCB manufacturing process, and there are some differences between them. Below we will explore the flow of these two processes and their differences in detail.

First, let’s understand the concepts of positive and negative films. In PCB manufacturing, the photolithography process mainly involves the production of photographic plates. The positive film is usually used to make the copper layer pattern of the PCB, while the negative film is used to make the solder mask, character logo and other patterns of the PCB.

Feature film process:

1. Design drawing: First, use CAD software to make drawings according to the PCB design drawings, including wiring, component installation locations, solder mask areas, etc.

2. Make negatives: Convert the drawings into negatives suitable for PCB production, usually using translucent film for printing.

3. Prepare photosensitive coating: In order to allow the pattern on the negative film to be transferred to the PCB material, a layer of photosensitive coating needs to be applied to the PCB material.

4. Exposure and development: Place the negative film on the PCB material coated with photosensitive agent, and transfer the pattern on the negative film to the PCB material through the exposure machine. Then, the exposed PCB material is developed to remove the unexposed portion of the photosensitive coating, leaving the exposed portion.

5. Corrosion: Use chemicals to corrode the developed PCB material to remove the copper layer in the exposed area, leaving only wiring, pads and other required circuits.

6. Cleaning: Clean the corroded PCB to remove residual photosensitizer and corrosive agent.

7. Solder mask and character marking: According to the PCB design requirements, the PCB is processed with solder mask and character marking.

Negative process:

1. Design and drawing: Just like the positive film, you first need to design and draw, including patterns such as solder mask and character logos.

2. Make negatives: Convert the designed drawings into negatives suitable for PCB production.

3. Prepare the negative film: Place the negative film on a piece of ordinary negative film, and fit the two negative films together to ensure accurate positioning.

4. Exposure and development: Place the negative film on the PCB material coated with photosensitizer, and transfer the pattern on the negative film to the PCB material through the exposure machine. Then, the exposed PCB material is developed to remove the unexposed portion of the photosensitive coating, leaving the exposed portion.

5. Corrosion: Use chemicals to corrode the developed PCB material to remove the copper layer in the unexposed areas, leaving only wiring, pads and other required circuits.

6. Cleaning: Clean the corroded PCB to remove residual photosensitizer and corrosive agent.

7. Solder mask and character marking: According to the PCB design requirements, the PCB is processed with solder mask and character marking.

The main difference between the positive and negative processes is the way the negative is made and the direction in which the pattern is transferred during the exposure process. In the positive film process, making negatives is to directly convert the designed drawings into negatives suitable for PCB production. In the negative film process, a negative film needs to be made first, then laminated to an ordinary film, and the pattern on the negative film is transferred to the PCB material through exposure.

In addition, other steps in the positive and negative processes, such as preparing the photosensitive coating, developing, etching, cleaning, soldering mask and character marking, are the same.

To sum up, the process differences between positive films and negative films in the PCB manufacturing process are mainly reflected in the way of making negative films and the direction of pattern transfer during the exposure process. Positive film is to directly convert the designed drawings into negative film, while negative film requires making a negative film and laminating it with ordinary negative film. Other steps such as photosensitization, development, etching, cleaning and solder mask are the same. The difference between these two processes allows them to achieve different pattern requirements of PCB, thereby meeting different PCB design needs.

Refined PCB design of low-power DC-DC power module.

1)1. Introduction to DC-DC power supply applications

1. Introduction to DC-DC application types

DC-DC power supply is the core device for DC voltage conversion, including LDO and other types. Among them, devices implemented using switching methods are often called DC-DC converters. This type of power supply has the advantages of low power consumption, high efficiency, small size, light weight, high reliability, anti-interference, and wide range output, so it is widely used in the electronic field.


2.Working principle of DC-DC power supply

The working principle of DC-DC power supply involves voltage conversion and regulation. This process is mainly realized through the converter of switching power supply. The DC-DC converter is responsible for converting the input DC voltage into the required output DC voltage in the switching power supply. In general, the working principle of this converter can be divided into three main steps:

1) Filtering: When the mains power is turned on through the input switch, it first becomes pulsating DC through the rectifier circuit, and then filters out the ripples through the filter circuit, turning it into smooth DC, which is supplied to the converter for conversion.

2) Conversion: The DC-DC converter generates a certain pulse power from the input voltage through the power switch tube and energy storage inductor, and then uses the pulse transformer and rectifier filter circuit to obtain the corresponding output voltage. The voltage conversion is achieved by controlling the switching timing of the switching tube through PWM (Pulse Width Modulation) or PFM (Frequency Modulation). In the switching power supply, the switching speed of the switching tube is very fast, and the switching action is generally completed within tens of microseconds. This speed is much faster than the adjustment speed of the traditional linear power supply.

3) Regulation: The stability of the output voltage is achieved through a feedback loop. When the output voltage increases, the sample signal obtained through the sampling resistor will increase. The error signal obtained after comparing this signal with the reference voltage will increase, and then the conduction of the switching tube is reduced through PWM or PFM control. The turn-on time is reduced, thereby reducing the average power output by the converter and achieving stability of the output voltage.

(2). Selection of key components

1. Output inductor

The inductor stores magnetic energy to ensure stable current output. When choosing an inductor, you need to weigh the size. Large inductors have small losses but slow response, while small inductors respond quickly but have large losses. Consider the saturation current to ensure the filtering effect.

2. Voltage dividing resistor

The voltage dividing resistors form a voltage dividing network and feed back the output voltage to the control circuit to accurately control the PWM duty cycle and stabilize the output voltage value. Choose high-precision resistors to ensure circuit accuracy.

3. Input capacitor

When selecting the input capacitor, consider the equivalent inductance and self-resonant frequency. Capacitors with large capacitance filter out low-frequency noise, and capacitors with small capacitance filter out high-frequency noise. Combination and parallel use can achieve excellent filtering effect, stabilize the input voltage and filter out AC components.

4. Output capacitor

The output capacitor filters out switching ripple and ensures pure output current. The larger the capacitance, the smaller the impedance and the easier it is for ripples to flow through. Choosing the appropriate output capacitor is critical to the stable operation of the circuit.


When selecting these core components, we need to consider various factors to achieve the best balance. For example, the selection of the inductor requires a balance between efficiency and response speed; the voltage divider resistor needs to accurately and stably feedback the voltage; the input and output capacitors need to be selected according to different operating frequency noise characteristics; and the final output capacitor needs to be Consider capacitance and ESR to minimize ripple. Through careful selection, we can make the circuit work in an efficient and stable state, thereby maximizing the performance of the circuit.

(3)DC-DC power supply layout and wiring recommendations

For power module layout and wiring, you can download the chip’s datasheet in advance and design according to the recommended layout and wiring.

1. Layout design
1) Chip power supply proximity principle: For the switching power supply that provides voltage to the chip, ensure that it is placed as close to the chip as possible. This prevents low-voltage output lines from being too long, thereby reducing voltage drop and ensuring that power supply performance is not affected.

2) Avoid electromagnetic interference: Switching power supplies work under high voltage and large current conditions, which may cause complex electromagnetic compatibility issues. Therefore, sensitive components should be avoided around the switching power supply to reduce the impact of electromagnetic interference on the work of the components.

3) Layout with the power supply chip as the core: During layout, the switching power supply chip should be organized as the core component. The input and output ends of the power filter should be laid out to ensure sufficient distance to prevent noise from coupling from the input end to the output end. Components should be arranged neatly and compactly on the PCB to reduce and shorten the leads and connections between components.

2. Wiring design
1) Avoid parallel wires: The wires used at the input and output ends should avoid adjacent parallel wires as much as possible to reduce unnecessary electromagnetic interference.

2) Thick ground wire: Thickening the ground wire between the input and output can ensure stable current and reduce feedback coupling.

3) Handling of high-current leads: High-current leads, such as public ground wires, power input/output wires, etc., should be made as thick as possible. This can reduce wiring resistance and voltage drop, thereby reducing self-excitation caused by parasitic coupling.


3. Heat dissipation considerations
1) Heat dissipation ground area: Since the heat dissipation of the switching power supply is relatively large, the area of the heat dissipation ground (copper) should be increased as much as possible to ensure effective heat dissipation.

2) Large-area copper laying and drilling: The input and output ends should be laid with copper over a large area and drilled with as many holes as possible. This can not only meet the current requirements, but also help improve the heat dissipation effect.

A must-read for engineers! What factors affect PCB stackup design?

When designing a PCB (printed circuit board), one of the most basic issues to consider is how many wiring layers, ground planes and power planes are needed to achieve the functions required by the circuit. The wiring layers, ground planes and power planes of the printed circuit board The determination of the number of plane layers is related to requirements such as circuit function, signal integrity, EMI, EMC, and manufacturing costs. For most designs, there are many conflicting requirements in factors such as PCB performance requirements, target cost, manufacturing technology, and system complexity. The stack-up design of the PCB is usually determined by a compromise after considering various factors. High-speed digital circuits and whisker circuits usually adopt multi-layer board designs. What factors affect PCB stackup design?

1. Layering

In a multi-layer PCB, it usually contains a signal layer (S), a power (P) plane and a ground (GND) plane. Power planes and ground planes are usually solid planes without separation, and they will provide a good low-impedance current return path for current from adjacent signal traces. The signal layer is mostly located between these power or ground reference plane layers, forming a symmetrical stripline or an asymmetrical stripline. The top and bottom layers of multi-layer PCBs are usually used to place components and a small number of traces. These signal traces must not be too long to reduce direct radiation generated by the traces.

2. Determine the single power supply reference plane (power plane)

The use of decoupling capacitors is an important measure to solve power supply integrity. Decoupling capacitors can only be placed on the top and bottom layers of the PCB. The traces, pads, and vias of the decoupling capacitor will seriously affect the effect of the decoupling capacitor. This requires that the traces connected to the decoupling capacitors should be as short and wide as possible during design, and the wires connected to the vias should also be considered. Keep it as short as possible. For example, in a high-speed digital circuit, you can place decoupling capacitors on the top layer of the PCB, assign layer 2 to the high-speed digital circuit (such as a processor) as the power layer, layer 3 as the signal layer, and layer 4 Set to high-speed digital circuit ground.

In addition, try to ensure that the signal traces driven by the same high-speed digital device use the same power layer as the reference plane, and this power layer is the power supply layer of the high-speed digital device.

3. Determine the multi-power reference plane

The multi-supply reference plane will be divided into several physical areas with different voltages. If there is a signal layer next to the multi-power layer, the signal current on the nearby signal layer will encounter an unideal return path, causing gaps in the return path. For high-speed digital signals, this unreasonable return path design may cause serious problems, so it is required that high-speed digital signal wiring should be kept away from multi-power reference planes.

4. Determine multiple ground reference planes (ground planes)

Multiple ground reference planes (ground layers) can provide a good low-impedance current return path, which can reduce common-mode EMl. Ground planes and power planes should be tightly coupled, and signal layers should be tightly coupled to adjacent reference planes. This can be achieved by reducing the thickness of the media between layers.

5. Reasonable design of wiring combinations

The two layers spanned by a signal path are called a “routing combination.” The best routing combination design avoids return current flow from one reference plane to another, but flows from one point (plane) of a reference plane to another point (plane). In order to complete complex wiring, interlayer conversion of wiring is inevitable. When converting between signal layers, it is necessary to ensure that the return current can flow smoothly from one reference plane to another. In a design, it makes sense to treat adjacent layers as a routing group. If a signal path needs to span multiple layers, it is usually not a reasonable design to use it as a routing group, because a path through multiple layers is not clear for return current. Although the ground bounce can be reduced by placing decoupling capacitors near the vias or reducing the dielectric thickness between the reference planes, it is not a good design.

6. Set the wiring direction

On the same signal layer, the direction of most wiring should be consistent and orthogonal to the wiring direction of adjacent signal layers. For example, you can set the wiring direction of one signal layer to the “Y-axis” direction, and set the wiring direction of another adjacent signal layer to the “X-axis” direction.

7. Adopt an even-numbered layer structure

From the designed PCB stackup, it can be found that the classic stackup design is almost all even-numbered layers, not odd-numbered layers. This emergency is caused by a variety of factors, as shown below.

It can be understood from the manufacturing process of printed circuit boards that all conductive layers in the circuit board are saved on the core layer. The material of the core layer is usually a double-sided cladding board. When the core layer is fully utilized, the conductive layer of the printed circuit board The number is even.

Even-layer printed circuit boards have cost advantages. Due to the lack of one layer of dielectric and copper coating, the cost of raw materials for odd-numbered printed circuit boards is slightly lower than the cost of even-numbered printed circuit boards. However, because odd-numbered layer printed circuit boards require a non-standard laminated core layer bonding process based on the core layer structure process, the processing cost of odd-numbered layer printed circuit boards is significantly higher than even-numbered layer printed circuit boards. Compared with the ordinary core structure, adding copper cladding outside the core structure will lead to a decrease in production efficiency and a prolongation of the production cycle. The outer core layer also requires additional processing before lamination and bonding, which increases the risk of scratches and incorrect etching of the outer layer. The added outer layer treatment will significantly increase manufacturing costs.

When the inner and outer layers of a printed circuit board are cooled after the multi-layer circuit bonding process, different lamination tensions will cause the printed circuit board to bend to varying degrees. And as the thickness of the board increases, the risk of bending of a composite printed circuit board with two different structures increases. Odd-numbered circuit boards are prone to bending, while even-numbered layers of printed circuit boards can prevent the circuit board from bending.

During design, if there are an odd number of layers, you can use the following method to increase the number of layers.

If you design a printed circuit board with an even number of power layers and an odd number of signal layers, you can use the method of adding signal layers. The added signal layer will not lead to an increase in cost, but can shorten the processing time and improve the quality of the printed circuit board.

If you design a printed circuit board with an odd number of power layers and an even number of signal layers, you can use the method of adding power layers. Another simple method is to add a ground layer in the middle of the stack without changing other settings, that is, first lay out the odd-numbered printed circuit board layers, and then copy a ground layer in the middle.

In microwave circuits and mixed media (media with different dielectric constants) circuits, a blank signal layer can be added near the center of the PCB stackup to minimize stackup imbalance.

8. Cost considerations

In terms of manufacturing cost, with the same PCB area, the cost of multi-layer circuit boards is definitely higher than single-layer and double-layer circuit boards, and the more layers, the higher the cost. However, when considering factors such as circuit function and circuit board miniaturization, and ensuring signal integrity, EMl, EMC and other performance indicators, multi-layer circuit boards should be used as much as possible. Comprehensive evaluation shows that the cost difference between multi-layer circuit boards and single- and double-layer circuit boards is not much higher than expected.

These nine component packages in PCB design.

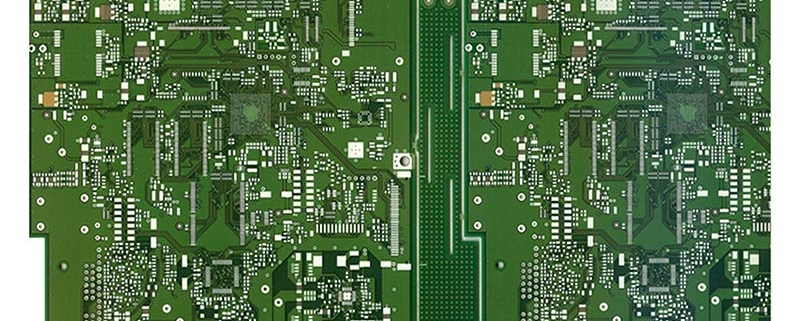
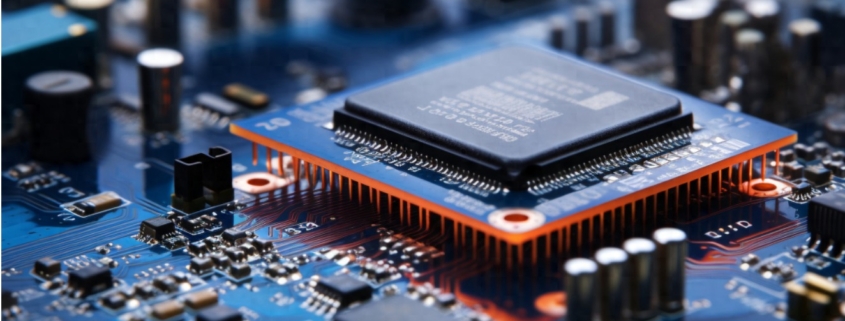
For most electronic components, common discrete component packages mainly include diodes, capacitors, resistors and transistors; common integrated circuits mainly include single in-line and dual in-line. At the same time, wires are connected to the pins of the package shell through the contacts on the chip, and these pins are connected to other devices through wires on the printed circuit board, thereby realizing the connection between the internal chip and the external circuit. Different components can use the same component package, and the same type of components can also have different packaging forms.

An important indicator to measure whether a chip packaging technology is advanced or not is: the ratio of chip area to packaging area. The closer this ratio is to 1, the better. The main factors to consider when packaging: the ratio of chip area to packaging area, in order to improve packaging efficiency, should be as close to 1:1 as possible. The pins should be as short as possible to reduce delay, and the distance between pins should be as far as possible to ensure that they do not interfere with each other and improve performance. Based on heat dissipation requirements, the thinner the package, the better. Packaging has roughly gone through the following development process: structural aspect: TO→DIP→PLCC→QFP→BGA→CSP. In terms of materials: metal, ceramics → ceramics, plastics → plastics. Lead shape: long lead straight insertion→short lead or leadless mounting→ball bump. Assembly method: through-hole insertion → surface assembly → direct installation.

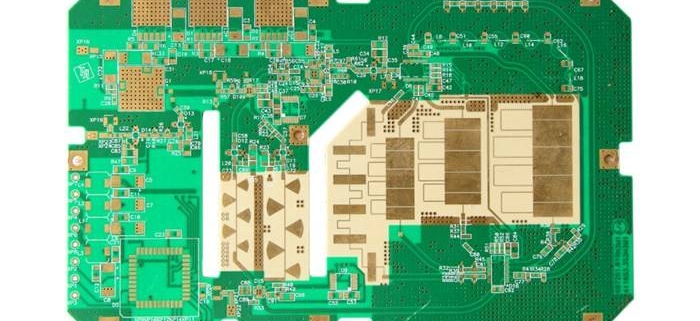
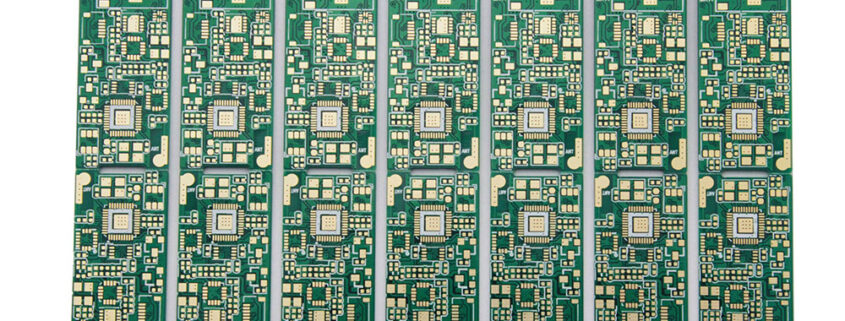
The following is an introduction to the specific packaging form:

SOP packaging technology was successfully developed by Philips Company from 1968 to 1969, and then gradually derived:

SOJ, J-lead small outline package

TSOP, Thin Small Outline Package

VSOP, Very Small Outline Package

SSOP, reduced SOP

TSSOP, thin reduced SOP

SOT, small outline transistor

SOIC, small outline integrated circuit

SOP/SOIC package

SOP is the abbreviation of English Small Outline Package, that is, small outline package.

DIP package

DIP is the abbreviation of “Double In-line Package” in English, that is, dual in-line package.

One of the plug-in packages, the pins are drawn from both sides of the package. The packaging materials are plastic and ceramic. DIP is the most popular plug-in package, and its application range includes standard logic IC, memory LSI, microcomputer circuits, etc.

PLCC package

PLCC is the abbreviation of “Plastic Leaded Chip Carrier” in English, which is plastic J-lead chip packaging.
The PLCC package has a square shape, a 32-pin package, and pins all around. The overall size is much smaller than the DIP package. PLCC packaging is suitable for installing wiring on PCB using SMT surface mounting technology. It has the advantages of small size and high reliability.

TQFP package
TQFP is the abbreviation of “Thin Quad Flat Package” in English, which is a thin plastic four-corner flat package. The four-sided flat packaging process can effectively utilize space, thereby reducing the space requirements for the printed circuit board.

Due to the reduced height and volume, this packaging process is ideal for applications with high space requirements, such as PCMCIA cards and network devices. Almost all ALTERA’s CPLD/FPGAs are available in TQFP packages.

PQFP package

PQFP is the abbreviation of “Plastic Quad Flat Package” in English, that is, plastic four-corner flat package.
The distance between the chip pins of the PQFP package is very small and the pins are very thin. Generally, large-scale or very large-scale integrated circuits adopt this packaging form, and the number of pins is generally more than 100.

TSOP package

TSOP is the abbreviation of “Thin Small Outline Package” in English, which is thin small size package. A typical feature of TSOP memory packaging technology is to make pins around the packaged chip. TSOP is suitable for installing wiring on PCB using SMT (surface mounting) technology.

The TSOP package shape has reduced parasitic parameters (output voltage disturbance caused when the current changes significantly), which is suitable for high-frequency applications. It is easier to operate and has higher reliability.
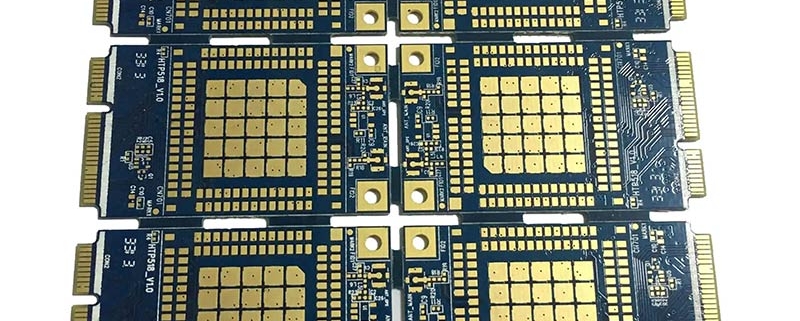
BGA package

BGA is the abbreviation of “Ball Grid Array Package” in English, which is ball grid array package. In the 1990s, with the advancement of technology, chip integration continued to increase, the number of I/O pins increased dramatically, power consumption also increased, and the requirements for integrated circuit packaging became more stringent. In order to meet the needs of development, BGA packaging began to be used in production.

Memory packaged with BGA technology can increase the memory capacity by two to three times while maintaining the same volume. Compared with TSOP, BGA has a smaller volume, better heat dissipation and electrical performance. BGA packaging technology has greatly improved the storage capacity per square inch. Memory products using BGA packaging technology are only one-third of the size of TSOP packaging with the same capacity. In addition, compared with the traditional TSOP packaging method, the BGA packaging method has a faster and more effective heat dissipation path.

The I/O terminals of the BGA package are distributed under the package in the form of circular or columnar solder joints in an array. The advantage of BGA technology is that although the number of I/O pins has increased, the pin spacing has not decreased but increased, thus Improved assembly yield. Although its power consumption increases, BGA can be welded using a controlled collapse chip method, which can improve its electrothermal performance. The thickness and weight are reduced compared with previous packaging technologies; the parasitic parameters are reduced, the signal transmission delay is small, and the frequency of use is greatly increased; coplanar welding can be used for assembly, and reliability is high.

QFP package

QFP is the abbreviation of “Quad Flat Package”, which is a small square flat package. QFP packaging was frequently used in early graphics cards, but there are few QFP packaged graphics memories with speeds above 4ns. Due to process and performance issues, they have been gradually replaced by TSOP-II and BGA. The QFP package has pins around the particle, which is quite obvious to identify. Four-side pin flat package. One of the surface mount packages, the pins are drawn out from four sides in a gull-wing (L) shape.

There are three types of base materials: ceramic, metal and plastic. In terms of quantity, plastic packaging accounts for the vast majority. When the material is not specifically indicated, in most cases it is plastic QFP. Plastic QFP is the most popular multi-pin LSI package. It is not only used in digital logic LSI circuits such as microprocessors and gate arrays, but also in analog LSI circuits such as VTR signal processing and audio signal processing.

The pin center distance is available in various specifications such as 1.0mm, 0.8mm, 0.65mm, 0.5mm, 0.4mm, 0.3mm, etc. The maximum number of pins in the 0.65mm center distance specification is 304.

TinyBGA package

When it comes to BGA packaging, we cannot fail to mention Kingmax’s patented TinyBGA technology. TinyBGA is called “Tiny Ball Grid” in English. It is a branch of BGA packaging technology and was successfully developed by Kingmax Company in August 1998. The ratio of the chip area to the packaging area is not less than 1:1.14, which can increase the memory capacity by 2 to 3 times without changing the memory size. Compared with TSOP package products, it has smaller size, better heat dissipation performance and electrical performance.

Memory products using TinyBGA packaging technology are only 1/3 of TSOP packaging with the same capacity. The pins of TSOP packaged memory are led from the periphery of the chip, while the pins of TinyBGA are led from the center of the chip. This method effectively shortens the signal transmission distance. The length of the signal transmission line is only 1/4 of the traditional TSOP technology, so the signal attenuation is also reduced. This not only greatly improves the anti-interference and anti-noise performance of the chip, but also improves the electrical performance. Chips using TinyBGA packaging can withstand FSBs up to 300MHz, while traditional TSOP packaging technology can only withstand FSBs up to 150MHz.

TinyBGA packaged memory is also thinner (package height is less than 0.8mm), and the effective heat dissipation path from the metal substrate to the heat sink is only 0.36mm. Therefore, TinyBGA memory has higher heat conduction efficiency, is very suitable for systems that run for a long time, and has excellent stability.

8L 2+N+2 communication PCB

What is the appropriate safe distance between PCB board edges?

PCB board edge safety distance refers to the minimum safety distance between the edge of the circuit on the PCB board and the board boundary. The determination of this distance is very important to ensure the reliability of the circuit and prevent interference between circuits. This article will discuss in detail the appropriate range of PCB board edge safety distance and its impact on circuit design.

1. Concept and background of PCB edge safety distance

PCB, the printed circuit board, plays a very important role in modern electronic products. The PCB board edge safety distance refers to the minimum safe distance between the circuit on the PCB board and the edge of the board. This concept is proposed to ensure the reliability of the circuit, prevent interference between circuits and meet safety requirements.

When designing a PCB board, you need to take into account the spacing between circuits and the spacing between the circuits and the edges of the board. This is because without proper spacing between circuits, mutual interference between circuits may occur, resulting in circuit performance degradation or even damage.

2. Parameter influencing factors of PCB board edge safety distance

1. Insulation material: PCB boards usually use materials with good insulation properties, such as FR4, which plays a very good role in isolating interference between circuits.

2. Working voltage: The higher the working voltage of the circuit, the safety distance between the edges of the board should also be increased accordingly to ensure that the current will not cause short circuit or breakdown.

3. Version requirements: Different circuit boards have different version requirements, and they also have different requirements for the safety distance between the edges of the board. For example, the requirements for civilian products and military products will be different.

4. Electromagnetic compatibility (EMC): The safety distance between the edges of the board will also be affected by electromagnetic compatibility. When designing, it is necessary to consider the electromagnetic crosstalk problem between circuits and reasonably determine the safe distance between the edges of the board.

3. Measurement and calculation method of PCB board edge safety distance

In actual design, how to measure and calculate the PCB board edge safety distance is also a crucial step. Here are two common methods:

1. Standard method measurement: According to the standard requirements, directly measure the distance from the edge of the board to the nearest circuit.

2. Electric field analysis method calculation: By using professional electromagnetic simulation software, the electric field distribution between the circuit and the board edge is simulated and analyzed to determine the board edge safety distance.

4. Appropriate range of safety distance between PCB board edges

When determining the safe distance from the edge of the PCB board, it needs to be considered based on the specific application scenarios and product requirements. Generally speaking, a reasonable safe distance from the edge of the board should meet the following conditions:

1. Minimum safe distance between circuits: ensure that arc breakdown and mutual interference will not occur between circuits. According to different circuit design requirements, this distance needs to be within a certain range.

2. Electromagnetic compatibility (EMC) requirements: Ensure that the circuit does not produce electromagnetic interference that affects other circuits or equipment when working. According to the standard requirements of different countries and industries, the safety distance from the edge of the board will also be different.

3. Safety requirements: Ensure that the circuit will not cause safety risks and will not cause short circuit, overheating or other faults within its design life. Depending on different application scenarios and product requirements, a larger safety distance from the board edge is sometimes required.

To sum up, the safety distance from the edge of the PCB board is one of the important parameters to ensure the reliability and safety of the circuit. Its proper setup and design will help reduce interference between circuits, prevent short circuits and failures, and meet electromagnetic compatibility requirements. During the specific design, it is necessary to comprehensively consider the circuit type, operating voltage, version requirements, safety requirements, etc., with the help of appropriate measurement and calculation methods, and clearly stipulate them in the design specifications to ensure that the safety distance from the edge of the PCB board is set correctly. Reasonableness and reliability.

What are the connections and differences between PCB, SMT and PCBA?

PCB, SMT and PCBA are key terms in the electronic product manufacturing process. They represent circuit boards, surface mount technology and assembled circuit boards respectively. In this article, we’ll explore the connections and differences between them in detail.

PCB is one of the most common components in electronic devices. It is usually made of a non-conductive material (usually paper, fiberglass, or plastic) on which wire connections between electronic components are formed. PCB design can be done on a computer and produced during the manufacturing process. The designer converts the circuit diagram into a physical layout, which is then transferred to the manufacturer using CAD software and finally generated through the manufacturing process.

SMT is a technology for surface-gluing components to a PCB. In traditional PCB manufacturing methods, components are usually attached to the board via nails or soldered pins. However, SMT technology replaces traditional socket components by using surface mount components (SMD), allowing components to be directly attached to the surface of the PCB, thereby improving component density, reliability and manufacturing efficiency.

Through SMT technology, electronic components can be arranged more closely on the PCB, thereby reducing the size of the circuit board and improving product reliability and performance. In addition, SMT can also realize automated production processes, reducing the need for manual operations and improving manufacturing efficiency. It is worth noting that although SMT technology can reduce the use of socket-type components, some special components (such as high-power components) may still require socket-type connections.

PCBA refers to a PCB that has completed component pasting and welding. During the PCBA process, the components are placed in the correct position on the PCB through SMT equipment, and then they are firmly fixed on the PCB using hot plug boards or other soldering methods. After completing the welding, a series of inspections and tests are required to ensure the quality and reliability of the PCBA. Ultimately, the PCBA will be integrated into the final product as a finished product.

To sum up, PCB, SMT and PCBA play different roles in the electronic manufacturing process. PCB is the basis of the circuit board, carrying the connections between electronic components; SMT technology is a method of pasting surface mount components onto the PCB, allowing the components to be arranged more closely on the PCB, improving the performance and performance of the circuit board. Manufacturing efficiency; PCBA refers to a PCB that has completed component pasting and welding. After a series of tests and inspections, it can be directly put into the manufacturing of the final product.

In modern electronics manufacturing, PCB, SMT and PCBA are indispensable links. Their close connection makes the manufacturing of electronic products more efficient and reliable. Through the application of these technologies, electronic devices with smaller size and higher performance can be realized to meet people’s demand for portable and powerful products.